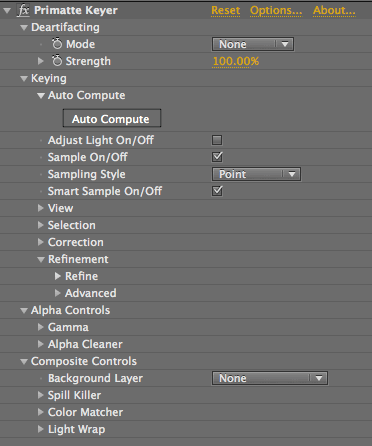
Summary of Primatte interface
Primatte Keyer is known for its ease of use, speed and great keying results. Primatte works equally well with any color backing screen, although green or blue are the traditional colors. Its unique algorithm lets you pull the most difficult mattes, even from a person wearing a blue denim shirt and blue jeans in front of a bright blue screen.
The Primatte 5.1 interface is broken into logical groups for keying controls, selection controls, spill correction, detail touchup, color correction and advanced compositing.
Go here for interface changes from Primatte 4.0.
Keying group
In Keying group is where all of the keying functions are located and includes many options for automation. Learn more
Keying> View group
The View group designates what View mode you see in the Comp Window, and lets you split the view to see your keyed footage in various states simultaneously. Learn more
Keying> Selection group
Outside of the Auto Compute button, the Selection group is the heart of Primatte Keyer. It contains the primary tools that you will use to perform Primatte’s keying. Learn more
Keying> Correction group
Once you have generated your matte, the Correction group will tweak it to a great composite. These tools perform the Fine Tune functions with a greater degree of automation. Learn more
Keying> Refinement group
The Refinement group lets you reduce or recover the amount of spill color, matte density and level of preserved detail. Learn more
Deartifcating group
The Deartifacting group removes any blocking around the edges of the image caused by compression algorithms in the source format. Learn more
Alpha Controls group
The Alpha Control group lets you make adjustments to the matte to achieve a superior composite. Learn more
Composite Controls group
The Composite Controls group incorporates some of the color correction and advanced compositing features found in Red Giant’s Key Correct plug-in set. Learn more