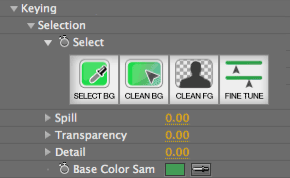
Keying> Selection group
Outside of the Auto Compute button, the Selection group is the heart of Primatte Keyer. It contains the primary tools that you will use to perform Primatte’s keying. Primatte typically follows a four step process that uses the Select tools: Select BG, Clean BG, Clean FG and Fine Tune. If you first use Auto Compute, you may skip some or all of these steps since Auto Compute is more of a one-click solution.
What is sampling? The Primatte keying process requires you to designate areas of your chromakey shot as either foreground (fully opaque) or background (fully transparent). You do this by click-dragging in the background screen area to select and sample its color. Primatte will then generate a matte based on these selections.
NOTE: Typically when you click and drag on a clip, you will reposition that clip. To prevent the clip from moving, Primatte must be highlighted in the Effect Controls palette. If your image shifts when you go to sample, Primatte has been deselected in the Effect Controls palette. Also, make sure the Sample On/Off checkbox is turned on so you are sampling color instead of moving the clip.
Select BG button
Select BG lets you select the color you want to remove from the frame or sequence. 'BG' stands for Background, and this button is the first step in creating a matte with Primatte. While the two most common screen colors are blue and green, Primatte Keyer can extract a matte from any color.
To use the Select BG tool, position your cursor over the bluescreen (or greenscreen) area of the View window, near the foreground object. Sample the targeted background color by click-dragging to select a range of pixels. After you release the mouse button, Primatte Keyer will start the compositing process and quickly generate a matte.
Click on background only: Be careful not to sample over any of the foreground area. If you do drag over the foreground area, simply undo the action, or click the host application's Reset button.
Click, then click again: This first sample that you choose determines the initial color range and sets the center point for the Primatte algorithm. If you don't think the key that it sets is accurate, you can click again to set a new initial sample. If you can't get a good key, try resetting Primatte with the host application's Reset button, and start over with a different initial sample.
Single pixel vs range of pixels: You can either click to select a single pixel, or click-drag to select a range of pixels. In many instances, Primatte works better when only a single pixel is sampled instead of a range of pixels. If you sample a range of pixels, Primatte will average together the different color values of the sampled pixels to find a single color value to remove. For example, if the foreground image contains a shadow that you want to keep in the final composite, selecting these shadow pixels when sampling will result in the shadow being keyed out. To prevent the shadow from being included in the matte, click once in area outside shadow. Primatte Keyer will select only those pixels with that same color value, leaving the darker pixels of the shadow with the rest of the foreground image.
Modified by Smart Sample: When the Smart Sample On/Off checkbox is on, the Select BG button will create its sample using the new Primatte 5.1 algorithm. When Smart Sample is turned off, Select BG will sample using the Primatte 4.0 algorithm.
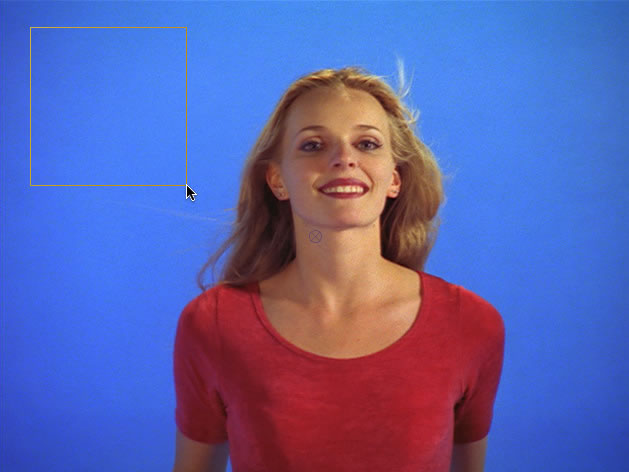
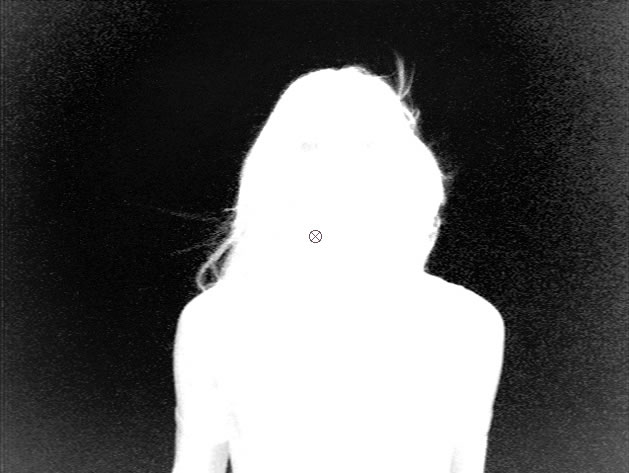
At left, the original bluescreen area is sampled. At right, the resulting matte.
If the foreground image was shot on a properly lit bluescreen stage, Primatte Keyer will do 90% of the matte generation in this first step.
Clean BG button
Clean BG lets you remove the noise from the background areas of the matte. 'BG' still stands for Background, and this button is the second step in creating a matte with Primatte.
Depending on how well (or poorly) your chromakey scene was shot, there will be unwanted noise areas in the matte. The Clean BG tool lets you quickly sample the noise to remove it. To remove the noise, with the Clean BG button selected, click-drag to sample pixels in the background that look like noise. If you are viewing the image in Matte View, the unwanted noise areas will look white in the black area of the matte. those areas look like scattered white pixels, and the Clean BG tool will turn them into black. Sample only areas that you know to be entirely in the background screen area and which you want completely removed.
Click on background only: Be careful not to sample over any of the foreground area. Selecting these regions will produce unwanted results. If you do drag over the foreground area, simply undo the action.
Click multiple times: You can sample multiple areas of the background to remove its noise. In fact, you generally do need to click-sample-drag the noisy areas several times to clean the background area. However, there is no need to eliminate all noise in the bluescreen portions of the image. If you attempt to remove all the noise around the foreground object, the resulting composite may not look convincing. You can always recover some detail later in the process using tools like the Fine Tune button.
Look in Matte View: It is helpful to change the View option to Matte View before starting this process. While using Clean BG, it is possible to accidentally cause too much detail to be removed from the foreground element.
NOTE: If you are having trouble seeing any noise, try increasing the gamma of your monitor. Increasing the gamma can make it much easier to see dark noise in the matte. Or if you are on a flat panel monitor, try looking at the monitor from an angle. This can also let you to see noise that is often not visible when looking head-on.
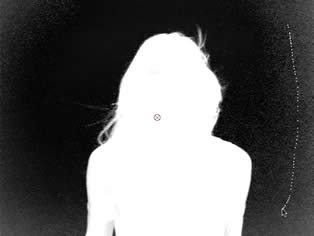
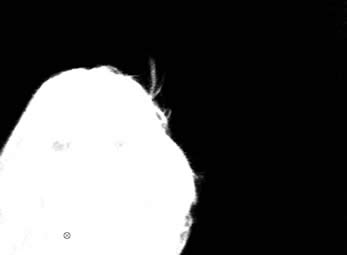
At left, sampling the background to eliminate the noise. At right, multiple areas were sampled to remove the noise.
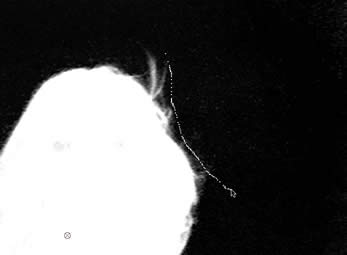
At left, incorrect sampling. The Clean BG tool is dragged too close to the semi-transparent hair of our foreground subject.
At right, the sample region was too close to the wispy hair, and as a result too much detail has been removed.
Clean FG button
Clean FG lets you remove the noise from the foreground areas of the matte. 'FG' stands for Foreground, and this button is the third step in creating a matte with Primatte.
Clean FG is essentially the opposite of Clean BG. If you are looking in Matte view mode, you will sample any dark areas in the middle of the white foreground area. To remove the noise, with the Clean FG button selected, click-drag to sample pixels in the foreground that look like noise. Sample the darker areas in the foreground area until they are completely white. Click-drag in areas that are 100% foreground, so the sampled pixels are registered by Primatte to be the same color as in the original foreground image. This will make dark gray areas become white.
The same rules for Clean BG also apply to Clean FG. For example, these dark regions should be in areas that are supposed to be 100% foreground and white. Do not sample fine detail areas such as hair, glass or water. Avoid selecting any areas that are transition areas, where the foreground and background elements are going to be blended together such as the edges of the foreground objects.
Click on foreground only: Be careful not to sample over any of the background area, or in the soft edged transition between foreground and background. Selecting these regions will produce unwanted results. If you do drag over the background area, simply undo the action.
Look in Matte View: As with Clean BG, it is helpful to look in View> Matte View so the right amount of detail is preserved.


At left, an Clean FG sample. At right, the result of that sample.
Select> Fine Tune button
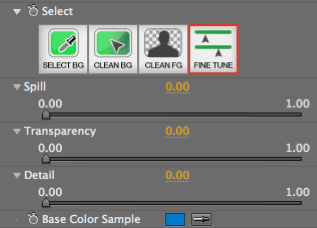
Click the Fine Tune button to open a full view of the Spill, Transparency and Detail sliders. These three controls let you select problem areas in your image in order to correct them, such as areas with color spill, or elements that have too little or too much transparency. After sampling the trouble area, the three sliders will snap to whatever the current values are for the sampled pixels.
NOTE: Until the Fine Tune button is selected and a sample is made, the three sliders will remain deactivated. For a better understanding of Primatte’s internal algorithm, known as the Polyhedral Slicing Algorithm, please refer to How Primatte actually works.
Fine Tune> Spill slider
Performs a color adjustment on the foreground by controlling the amount of the background color present in the sampled foreground area.
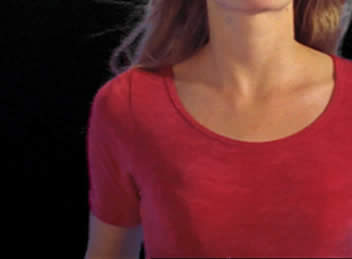
The Spill Slider value represents the amount of spill removal applied to the image. To remove more spill, increase this value. The slider adjustment will only affect spill in the color region selected before moving the slider. Only the spill region should be affected; the rest of the image should look unchanged. Repeat this process on all regions with color spill until all spill is removed. For the example shown below, you might select some spill in the light flesh tones, remove it, then select spill on the dark flesh tones, remove it, and then sample and remove spill in the red sweaters.
After performing a spill removal operation, you may notice a yellow or magenta tint on the foreground. Try lowering the Spill value to compensate for this tinting. After resampling, increase the Spill value in small increments, such as 0.1. A small value change can often result in a significant change in color to the image.
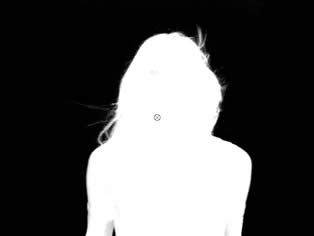
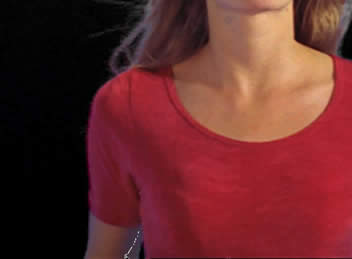
At left, the foreground image. There is a lot of blue spill on the inside of the woman’s arm. At right, the controls before the sample.
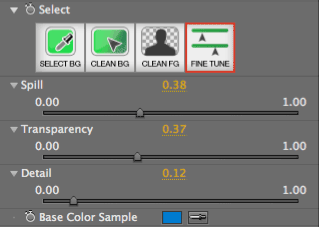
At left, sampling an area of spill in the foreground to remove it. At right, the sliders have snapped to the values associated with the sampled area.


At left, blue spill areas on the arm before Spill Slider was increased from 0.38 to 0.44. At right, the image after the adjustment.
Fine Tune> Transparency slider
Adjusts the opacity of the matte by increasing the transparency of the sampled color range. Use the Transparency Slider to adjust the softness of foreground areas such as shadows.
As with the Spill Slider, increasing the value will make the sampled area more transparent.
![]()
![]()
At left, a sample is made of the cigarette's shadow. At right, the Transparency value is increased slightly and the shadow becomes more transparent.
Fine Tune> Detail slider
Restores the visibility of foreground pixels that have disappeared because of a close similarity to the background color. Use the Detail Slider to restore lost detail like hair or smoke.

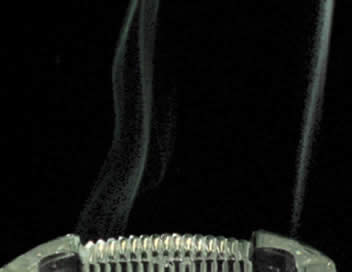
At left , some smoke detail had been lost during the spill removal procedure. A sample is made where the smoke used to be and the value of the Detail Slider is decreased.
At right, the result is to increase the amount of detail visible in the element.
Base Color Sample
Lets you manually choose the color that Primatte bases its key off. Having this value in its own control enables you to set a keyframe for the background sample color. If you have big color shifts in your footage, keyframe the Base Color Sample to tell Primatte to see different colors as the key base.
Why is this useful? Let’s say that you are working on a music video with a singer in front of a bluescreen. The singer was illuminated from the front by colored disco lights, and these colors altered the blue color in the bluescreen on almost every frame. This makes keying the shot with Primatte difficult. However, if you keyframe Base Color Sample, you can sample different color ranges throughout the shot and Primatte will interpolate the sample color accordingly.
When you first apply Primatte to your chromakey source, the default sample color will show as black. Once you sample with the Select BG tool, the Base Color Sample swatch will change to reflect that sample color. It sets a separate value for the sample color by using the average of the colors sampled with Select BG.
IMPORTANT: Once the base color has been sampled, all subsequent Primatte color correction functions are dependent upon the sample. It is essential that you keyframe your animated Base Color Sample before you perform any spill correction or transparency functions. If you perform any foreground correction and then alter the Base Color Sample, either by resampling the background or by animating the value manually, all color correction operations will be lost and must be resampled.
![]()
![]()
At left, the original swatch. At right, the swatch post-sample.