
Distribution Assistants: Common Parameters
This section lists the parameters that you will find in most or all of the Distribution Assistants. These six tools are: Linear Assistant, Planar Assistant, Cubic Distribution, Spheroid Distribution, Cylinder Distribution and Pyramid Distribution. Most tools have a Lite version as well.
Starting Value
The point in 3D space where the Assistant will begin distributing your layers. Leaving the X, Y, and Z values set to 0,0,0, (the default position) will result in the first layer being distributed in the upper left corner of your composition. Remember that the center of After Effects’ 3D space is at 0,0,0.
Of course, you can move the centerpoint anywhere along the X, Y, and Z axes. The values can be positive or negative, and will move the Starting Value point of the distribution within the Cartesian system as you would expect. This sets the center of the primitive as well.
Note: If you want to use the center of the composition, turn on the Comp Center checkbox (see below). When the Distribute Randomly checkbox is active, then Starting Value sets the center of the distribution.

Distribute Randomly checkbox
Takes all the layers and positions them randomly within the selected area. Turned off by default.
When Distribute Randomly is turned on, two things happen:
1- Starting Value becomes the center of the distribution and all layers are positioned around it.
2- The Distance parameters (see below) are inactive and grayed out.
For Starting Value:
When Distribute Randomly is on, the Starting Point acts as the seed point and the 'tree' of layers grow out from it. Usually a layer's position is based on the position of the layer placed before it. However, if we are distributing layers randomly, the assistant ignores where the last layer was placed and places the next layer randomly, relative to the Starting Point. This makes the Starting Value become the center of the cluster of layers.
For Distance:
When Distribute Randomly is on, the Distance values are turned off. If we are distributing layers randomly, there is no point in having a distance since all the layers are distributed throughout the primitive area. If you want to control where the layers are being placed, just make the size of the primitive, or larger or smaller.
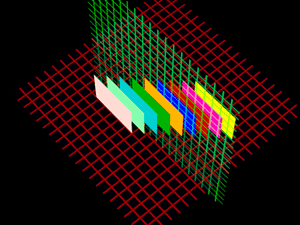
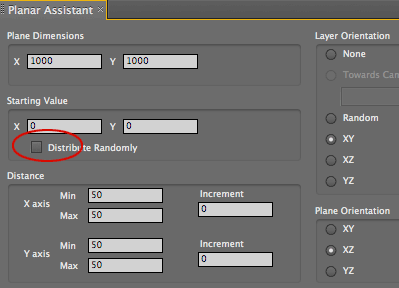
Distribute Randomly is off, Distance group is active.
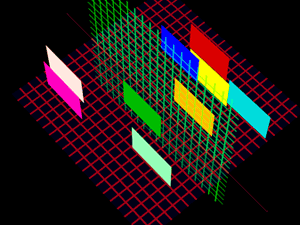
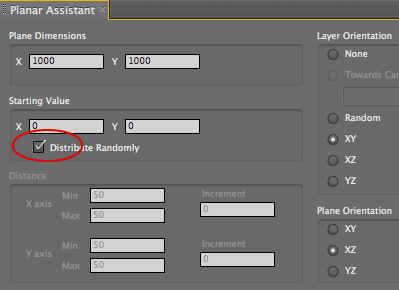
Distribute Randomly is on, Distance group is greyed out.
Bounding Box, Size, Dimensions
Sets the size of the bounding box that contains the primitive within which the layers are distributed.
The name of this parameter varies between Distribution tools. Sometimes it is called' Size', sometimes it's 'Dimensions' and sometimes 'Bounding Box'. The base shape is typically part of the parameter name.
For most Distribution assistants, the parameter will only set the boundaries for the other primitives. The actual distribution space will vary depending on the primitive. NOTE: Cubic Distribution works differently for this parameter. Its Cube Dimensions set the exact size of the cube that is created, filling its bounding box completely.

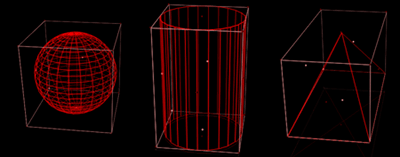
Squares shown around the primitive shapes are the invisible 'bounding boxes'. Primitives are created so they fill the maximum space in the bounding box.
Distance group
This group of controls determines how far apart the layers will be distributed, and supports negative and positive values.
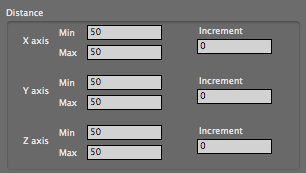
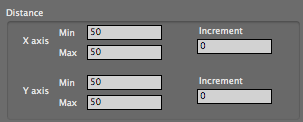
Here is how Distance works: Once the first layer gets placed, the Assistant looks at the values in the Min and Max fields for each axis. It selects a value for each axis, then adds that value to the position value of the last layer it placed, and that becomes the new position for the next layer being placed.
![]()
![]()

Left to right, Distance for Cubic Distribution, Planar Assistant and Linear Assistant. Each tool adds another axis for distribution of layers.
Some tips when working with Distance:
About the Increment values:
Two examples of Distance
Let's look at two examples of Distance. We have used the Linear Assistant since its distibution only works in along one axis, but the concepts are the same when you’re working with all three axes.
Example 1 uses only positive values. The Starting Value is 0,0,0, the Min/Max distance is at 50, Increment is at 30, and there are 5 layers to distribute along the Z-axis. This means the Z positions would look like this: Equation: start value + Distance + (Increment * Layer #)

Example 2 uses both positive and negative values. If we have a similar situation where Min = -50, Max = 50, and Increment = 0, we will get the results below. Since Min and Max vary, the Distance will be random so your results may be different.

Insert Keys group
Three checkboxes that specify which layer properties will have a keyframe set for them: Position, Rotation and/or Scale. Insert Keys is a convenient way of setting the appropriate keyframes if you want to eventually animate your layers. You can certainly do this from the main After Effects interface, but using Insert Keys is more convenient and makes sure that you set keyframes for all the necessary properties.

By default, none of the checkboxes are active. This is because all of their keyframes may not be necessary for your animation. For instance, if you’re just moving your layers forward or backward in 3D space, you will only need to set Position keyframes. If you’re transforming your layers from a box to a sphere, you will need to set a Position and Rotation keyframe.
Insert Keys only sets keyframes at the point where the Time Marker is on the Timeline. Remember to deselect these checkboxes if you move to a different point in the timeline, but don’t want to set keyframes. Once you turn on a checkbox, it stays on until you turn it off.
Layer Orientation group
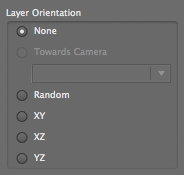
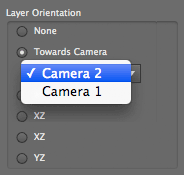
These buttons determine what axis the layers are oriented around. Regardless of whether the layers are being distributed along one, two, or three axes, you need to determine what axis they will be oriented around.
There are two ways to rotate a layer in After Effects' 3D space. You can use PlaneSpace's Layer Orientation group or after Effects' layer rotation parameters. When PlaneSpace Assistants need to rotate a layer in a particular 'pose', they should use Layer Orientation. Unlike After Effects' rotation, where you can have a layer flip around infinitely, Lyayer Orientation only lets you rotate the angle from 0 to 360. This works well, for instance, when animating a layer from the bottom of a box into a video wall. If you want layers spinning wildly, you will manually set the layer rotation values.
![]()
The buttons shown below are common to all Distribution Assistants. Some Assistants have additional Layer Orientation options which are discussed on that tool's manual page.

Left to right, distributed on Z axis, oriented on XY plane, XZ plane and YZ plane.
Options> Use Comp Center checkbox
If Use Comp Center is selected, the Starting Point (see above) is ignored and the starting point is set to the center of your composition.
For example, if your composition is 640 x 480, Use Comp Center will cause the starting point to be 320, 240, 0. Since After Effects’ 3D space defaults to 0,0,0, which is the upper left corner of the comp at the default view, this can be very handy if you just want the layer arrangement to appear in the middle of the comp.
NOTE: The exception is the Linear Assistant, for which Use Comp Center sets the position of the first layer.

Options> Reverse Layers Order checkbox
Normally, the top layer in the Timeline is the first one placed, and it’s placed at the Starting Value. Going downward in the Timeline from there, layers are placed sequentially in order. If you’d like to reverse this and have the bottom layer be the first one placed, select this checkbox. The bottom layer will be placed first, the layer above it second, and then upwards though the Timeline.
How layers are placed varies and you need to understand their placement if to get predictable results. See the sections on individual Creator assistants to see how layers are placed.
Options> Scale Layers To Fit checkbox
Scales the layers up or down so that they fit within the defined start and end values. Turned off by default.
If this checkbox is active, a layer will be scaled down to fit if its center point is placed within the defined area, but the layer itself does not fit. If this checkbox is inactive, then layers may extend over the boundary as long the center point is within it.
Normally, if the layers are oriented along certain axes, they will overlap. If you have set an End Value, then the layers are confined to that space and there is no way to position them so that they are touching edge to edge. When it is turned on, Scale Layers To Fit will scale the layers down so that they can be edge to edge and still fit within the space defined with the end value.
In all cases, the layers are aligned along the Z Axis.
NOTE: For some Assistants, this checkbox is tied to other parameters.
Options> Scale Layer To checkbox
Scales all selected layers to the numeric value that is entered. This value becomes the pixel dimensions for both the X and Y axis, making every layer the same size and square shape.
This option can be useful in a number of situations, especially if you want even spacing between layers. Keep in mind that if your layers are very different sizes, they will probably experience some distortion and/or pixelization when being 'evened' out. In extreme cases, it is best to set up the layers before trying to scale them.

Options> Random Layer Selection checkbox
Causes the layers to be selected randomly as they are being placed. Turned off by default. When Random Layers is active, the standard layer order is ignored. Also, Reverse Layer Order will be ignored if active.
Layers will not be used twice. Once a layer is selected and placed, another layer is randomly selected. This doesn’t affect where layers are placed; layers are placed exactly as they would be if the normal layer order was followed. The only difference is that instead of going down the Timeline (Layer 1... 2... 3... 4...), the layers are chosen out of order (Layer 5... 2... 8... 6...).
Options> Repeat Layers checkbox
Repeat Layers will automatically duplicate your selected layers however many times you tell it to. Turned off by default.
Turn on the checkbox and enter the number of repeats desired. This can be very useful if you’re trying to quickly fill an area up with layers. It can also crash your machine.
For example, if you have 7 layers and you want those layers duplicated 7 times, you can enter 7 in the Repeat Layers value box. When you click ‘Apply’, not only will the original 7 layers be placed, but 49 extra ones will be as well. By using this you can quickly and easily experiment with extra layers and figure out exactly how many you need without duplicating and/or deleting them manually. If 49 isn’t enough, just click Undo, enter in 10 instead and click apply. Maybe 70 is the magic number.
The downside is if you have 49 layers selected, you forget that Repeat Layers is turned on, and you repeat the 49 layers 10 times. You now have 490 layers, and unless you have a lot of RAM, you’re in trouble. This can potentially crash your machine. Pay attention to this checkbox and make sure you’re not going to create more layers than you have RAM for.
NOTE: Repeat Layers works differently in Creator Assistants. It will repeat layers only as they are needed because the Creator shape will eventually run out of space. See Creator Assistants, Common Parameters.
Options> Repeat Sequentially checkbox
Normally if Repeat Layers is selected, the layers will repeat next to each other in the Timeline. For example, if you repeat your layers once, your Timeline will look like the screenshot below at left.
With Repeat Sequentially, the layers are treated as a block. When they are duplicated, the whole block gets placed after the last layer, as in the screenshot below at right.
NOTE: This checkbox is available if Repeat Layers is turned on.


At left, the Timeline after Repeat Layers. At right, with Repeat Sequentially on.
Crop Text Layers to Size of Other 3D Layers checkbox
This checkbox does exactly what it sounds like. If the other 3D layers are smaller, this checkbox will crop the Text layer to the size of the smaller layers. Active by default.
![]()