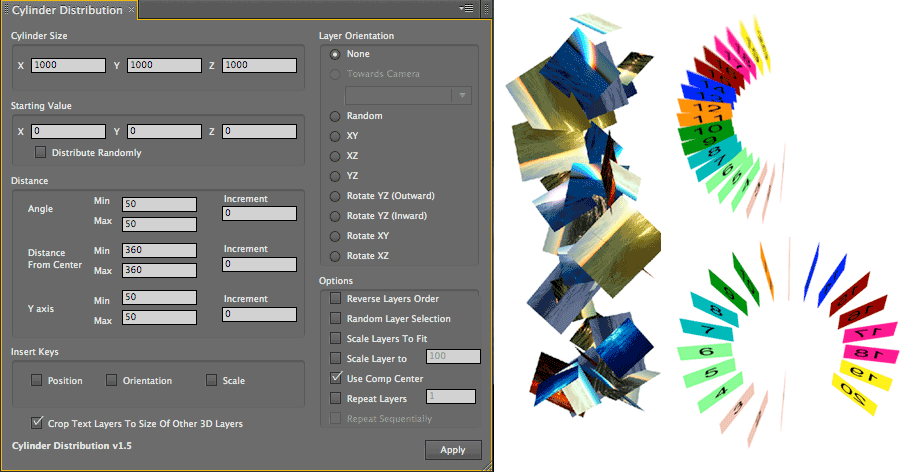
Distribution Assistants: Cylinder Distribution
Cylinder Distribution distributes layers within a 3D space defined by a cylinder. It orients the layers around the center of the cylinder, creating a ‘corkscrew’ or ‘fan’ effect. The distribution is actually quite different than the rest of the Distribution Assistants.
How it Works: Select the 3D layers in your composition that you wish to distribute within the cylinder, and go to Window> Cylinder Distribution.

Cylinder Size
Uses a bounding box to determine the size of the cylinder. The Y axis determines the height as you would expect. The X and Z axes form a rectangle which the diameter of the cylinder is created within.
See also: Distribution Assistants, Common Parameters

Starting Value
The point in 3D space where Cylinder Assistant will begin distributing your layers.
See Distribution Assistants, Common Parameters
Distance group
Cylinder Distribution behaves differently for the Distance group than the other Distribution Assistants. Instead of measuring distance in a straight line from other layers, as the other Distribution tools do, it measures distance in angles and from the center of the cylinder.
See also: Distribution Assistants, Common Parameters
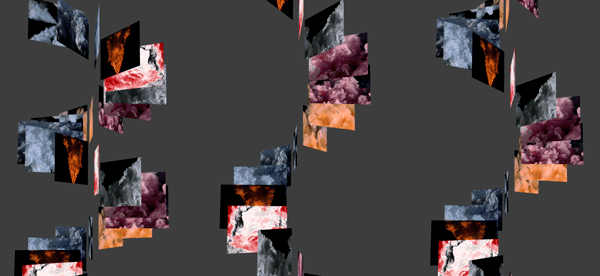
At left, Y Axis Min/Max is 120.
In middle, Y Axis Min/Max is 240 and the layers ascend faster. Both have a pattern in the way the layers curl upwards.
At right, Y Axis Min is 120 and Max is 240. The Assistant randomly picks a value between 120 and 240 and displaces the next layer by that amount. Notice the irregular form of the spiral.
Layer Orientation group
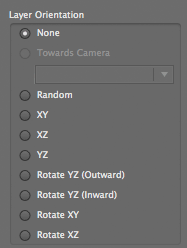
These buttons determine what axis the layers are oriented around. The common options are covered in the Layer Orientation group in Distribution Assistants, Common Parameters.
There are two additional options for Cylinder Distribution:
The result looks like there are several mini-cylinders within the main one that the layers are arranged around. This is somewhat similar to what goes on in Spheroid Distribution, except here the layers are rotated only around the Y axis, not all axes like the Spheroid Distribution. What’s special here is the ability to have the layers rotated around the Cylinder’s center regardless of the layer’s original orientation. This gives you the ability to create interesting arrangements that go beyond what most of the other Distribution Assistants can do.
![]()
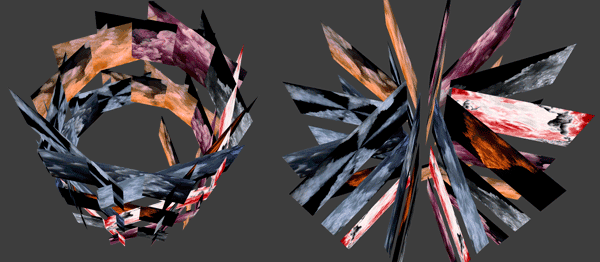
At left, layers oriented Outward so they face out of the sphere. At right, layers oriented Inward so they face into the sphere.
Insert Keys group
Three checkboxes that specify which layer properties will have a keyframe set for them: Position, Rotation and/or Scale.
See Distribution Assistants, Common Parameters
Scale Layers To Fit checkbox
If a layer’s center point is placed within the cylinder’s defined area, but the layer itself does not fit, this will cause the layer to be scaled down so it does fit. If this isn’t selected, then layers may extend over the boundary of the cylinder as long the center point is within it.
See also: Distribution Assistants, Common Parameters
Scale Layer To checkbox
Reverse Layers Order checkbox
Random Layer Order checkbox
Use Comp Center checkbox
Repeat Layers checkbox
Repeat Sequentially checkbox
Crop Text Layers to Size of Other 3D Layers checkbox
See Distribution Assistants, Common Parameters