
Quickstart for Radium Glow plug-in
Welcome to a quick introduction to the Radium Glow plug-in. This Quickstart uses screenshots and language from After Effects but its operation in other host applications is almost the same.
Radium Glow is fun and easy to use. Basically, the plug-in will create a 'brightness map' when it is first applied. The glowing areas are created around the brightness points of the source image. The brighter the point, the brighter and the bigger the glow. From there, you can control how the glow appears in shape and size; how it behaves against the source image, and how the composite renders out. Let's get started!
Step 1. Choose your image
First, choose your image. This is obvious, of course, but it's important to use the right tool for an effect. Your footage should be something that will benefit from a glowing effect. Building and city lights, street lamps, sparkly water surfaces, translucent or shiny objects are all great candidates for Radium Glow. Also keep in mind that a glow will show better in a high-contrast graphic, like a night scene or an image with distinct bright areas.
Step 2. Apply the plug-in
With the image layer selected, apply the plug-in from the Effect> Red Giant Warp> Radium Glow menu. Go to the Effect Controls palette.


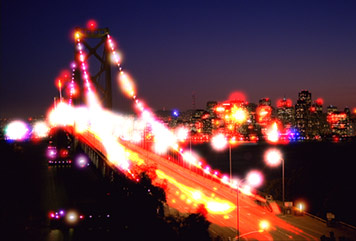
At left, our original Artbeats footage has high dark/light contrast. At right, the plug-in's default values are applied.
Step 3. Adjust the intensity of the glow
The default settings may look a little too bright at first but that is easily fixed. Let's adjust the intensity of our glow by changing its size and brightness. We can do this with Glow Intensity and Glow Radius from the Main settings.
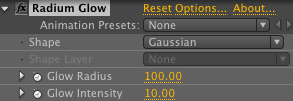
Radius sets the width of the glow around the brightest areas of the source image. By default, Radius is set at 100. If we move the value down to 40, the glow is more subtle because the glowing areas are smaller. Intensity sets the brightness of the glow. It determines the brightness value in each glow area, with every pixel taking on a percentage of the maximum possible glow. By default, Intensity is at 10. If we lower that value to 6, the glow dims down.
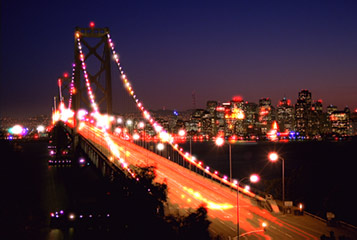
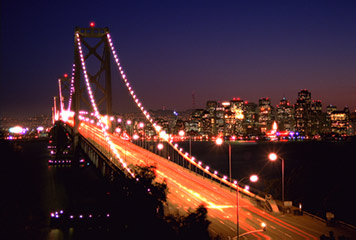
At left, Glow Radius changed from 100 to 40. At right, Glow Intensity changed from 10 to 6.
Step 4. View the brightness map
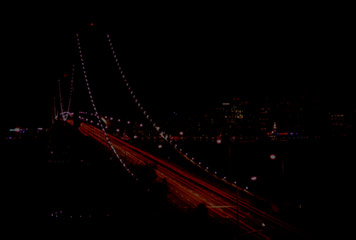
You can see the underlying brightness map created by Radium Glow. For this, go to the View pop-up in the Output group. Choose Brightness Map to see a representation of the pixels (or points) that are affected by the Radium Glow effect. To view your composite again, choose the default option, which is Output.
![]()

At left, brightness map with Threshold at 50%. At right, the View pop-up.
Step 5. Choose the glow shape
Now let's shape the glow. This is the fun part! In the Main group's Shape pop-up, you can choose from 12 pre-made glow types. Alternatively, you can load in a custom shape, like an imported bitmap graphic or a vector shape created in After Effects. To load a custom shape, choose the Custom Glow Shape option in the Shape pop-up. This will ungray the Shape Layer pop-up, which allows you to point to another layer in the Timeline. In our example below, we've loaded a pre-comped black-and-white Shape graphic.

The Shape menu lets you choose a custom image as a shape for the glow.
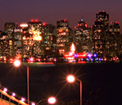
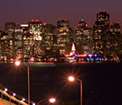
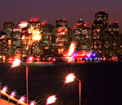

From left to right, Shape is Gaussian; Shape is Six Flare; Shape is a Custom Glow Shape graphic; the zig-zag graphic used.
Step 6. Toggle the quality/render
For our tutorial, we'll keep the zig-zag shape loaded. The result looks pretty cool, but we had to toggle a control to see how it really looks. In the Input group, there is a Quality pop-up. This control sets how accurately the glow points adhere to the brightness values.

By default, Quality is set to 4:1. This means that the glow builds rather quickly but can appear a bit blobby or chunky. It's a great setting for a faster workflow when you're designing the effect. If we set Quality to a lower value of 1:1, the glow takes longer build, but its results are more streamlined and make your image look better stylistically. Always do your final render at 1:1 or 2:1.
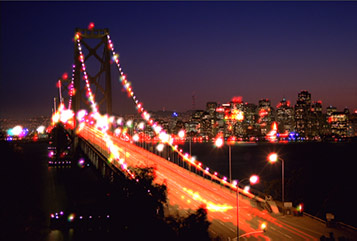
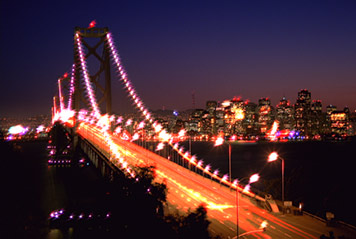
At left, glows at Quality 4:4 are a little chunky. At right, Quality 1:1 looks nicer.
Step 7. Experiment with color input
We'll keep our Quality set to 1:1 for this tutorial. Now let's experiment more in the Input group.
The Input Source Channels option selects the source channel for the creation of the brightness map. By default, it is set to Color, which is standard RGB mode. We can choose a different input color, such as only the Red channel or a Luminance histogram. Typically, choosing a different Input Source channel will tone down the colorfulness of your glow and give you whiter values.
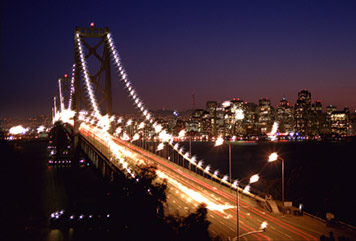
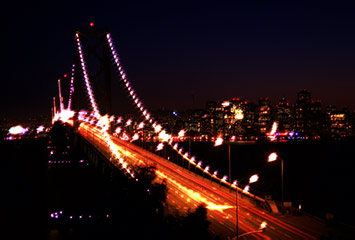
At left, Input Source Channels set to Lightness. At right, an experiment: The source layer has been duplicated; the top layer's Input Source Channels are set to Color; the bottom layer's Input Source Channels is set to Lightness; and the comp's Multiply mode merges the layers for an interesting effect.
Step 8. Mask the glow
Let's keep Input Source Control set to Color and return the comp's mode back to Normal. Suppose we don't want to see the glow everywhere in our image. It would be interesting to limit the brightness map to a certain part of the footage. We can do that with the Mask group of parameters.
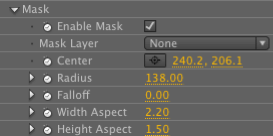

When you check Enable Mask, the plug-in automatically loads in the built-in mask, which is a small, feathered elliptical shape. You can manipulate that shape's position, width, height and gradation. If a soft circle or oval doesn't fit your needs, you can load in a custom mask with the Mask Layer pop-up. That mask can be a bitmapped graphic, a pre-comped shape layer, or whatever else can be recognized as an alpha. To view your mask as you are working, go to the View setting in the Output group and choose the Mask option.

At left, Mask Layer is set to a custom alpha, which limits the glow to the bridge image area. At right, the alpha channel being used.
Step 9. Set opacity and blend of the glow
When you're done experimenting, turn off the Mask group by unchecking Enable mask. The Output group has great controls for determining how the glow will be blended with the source footage.
By default, both Source Opacity and Glow Opacity are set to 100%. Lowering Source Opacity will lessen the opacity of the footage to which Radium Glow is applied. The composite will generally take on more bright/dark contrast, but the image may look a little blurred out at low values. Lowering Glow Opacity will lessen the opacity of the glow itself. This makes the entire glow effect lighter against the source footage, as if you were decreasing the glow's exposure.
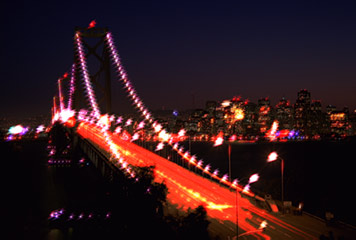
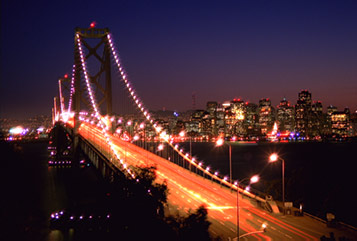
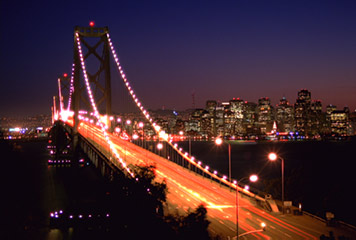
At left, Source Opacity at 50 lowers the image opacity. At right, Glow Opacity at 50 lowers the glow opacity.
Step 10. Make the glow broadcast-safe
Let's set our Opacity controls back to 100. We'll look at one more setting, the ever-familiar Transfer Modes. This pop-up works in the same way as if you were compositing the effect and the source on two layers and choosing a blend mode to combine the layers.
By default, the Add mode is selected. Choose other modes to see if they create a desirable effect, or set it back to Add mode if nothing strikes you. Keep the transfer mode that you like best.
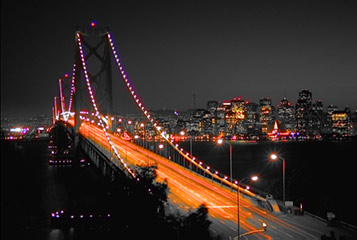
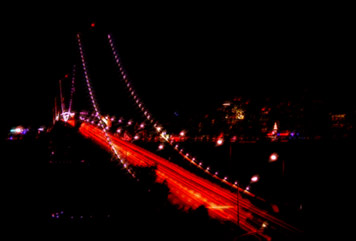
At left, Saturation creates an interesting nighttime effect. At right, Multiply creates an effect similar to Step 7's experiment but a little darker and blurrier.
Step 11. Make the glow broadcast-safe
Our final step is to make sure the composite is broadcast safe. By default, the Output group activates two controls: Prevent Overbrights and Overbright Clamp.
Together, these controls bring down values that are brighter than 100% white in the glow area. This can temper the extremely high glow intensities made possible by some settings, and keeps your image in the color-safe range for broadcast. Unless you have a reason to change these settings, leave them where they are. Note: This remapping happens before the final compositing, so the source values may still be overbright in the final image.

In conclusion
We are finished! Thanks for following along. When using the Radium Glow plug-in, you will immediately see its effect when you first apply the plug-in. Have fun making the glow look moodier, brighter or more colorful by adjusting controls like Intensity, Shape, Opacity and Input Source.