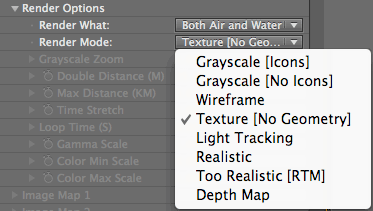
Render Options> Render Mode pop-up
In the Render Options group, the Render Mode settings control how your Psunami scene will be displayed and rendered.
Some Render Modes are intended to be used only as setup aids, while others are used to generate source layers for additional effects like depth of field blurs and lens flare tracking. The modes also let you display and render the final output version of your scene in two different qualities.
Final Cut Pro note: FCP users are often not as used to working in lower resolution modes like After Effects users. Since so many things in After Effects need to render, folks are very used to setting up filters and compositions in Half or Quarter resolution mode. This speeds up rendering, which speeds up your workflow. Psunami is definitely a filter that takes some time to render. FCP users will find that working in Low Res or Draft Res mode will make setting up the filter easier. One of the nice things about water is that it more or less looks the same at any resolution. You can do most of your setup in a lower resolution mode and be pretty certain that the final result will look very similar when you render it out in full resolution.

Render Mode pop-up
Overview of Render Modes
These modes let you display a variety of grayscale and wireframe setup modes, grayscale depth maps, or Light tracking dots for use with other plug-ins. With them, you can control the amount of geometry Psunami generates.
There are eight Render Mode options:
Render Mode> Grayscale (Icons)
Grayscale (Icons) tells Psunami to display an overhead view of the grayscale Image Map it uses to generate the water in your scene and to display representations of your camera and Image Map positions, as shown on the following page with Psunami's default settings.
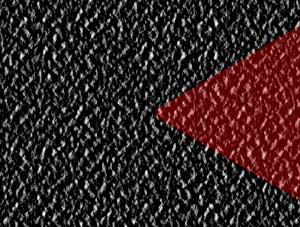
Grayscale (Icons) mode with default settings.
Render Mode> Grayscale (No Icons)
Grayscale (No Icons) displays the same grayscale image as Grayscale (Icons), but without the camera and Image Map icons. This mode was designed for you to render just the grayscale image or movie for use as a displacement map with After Effects' Displacement plug-in or with another 2D or 3D application.
If you have Image Maps applied as displacement maps, you will also see those images without their color frames in the Grayscale (No Icons) view. Otherwise it's identical to the Grayscale (Icons) Render Mode. TIP: Use the Color Min Scale and Color Max Scale controls to fine-tune a grayscale render.
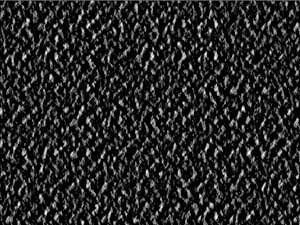
Grayscale (No Icons) mode with default settings.
How the Grayscale modes work
Psunami generates its 3D geometry from the same data set that is used to generate the grayscale map. Psunami calculates data representing the surface of the water, and then generates a single polygon, or flat 3D object, for each bit of data. Polygons are the fundamental building blocks of 3D geometry.
These polygons are attached edge to edge and laid down in a flat grid called a polygonal mesh. Then each polygon is displaced upward in 3D space away from the mesh, coinciding with the Lightness of the grayscale pixels—the Lighter the pixel, the higher the displacement. The edges of the polygons remain attached to each other, so the effect is like a flat rubber surface pushing upward or rolling downward.
As you animate the water, which Psunami does through its Primary Waves and Swells controls, the polygons move up and down, deforming the mesh surface accordingly. When the correct Lighting and reflection properties are added by Psunami's raytracing engine, the result is a realistic simulation of a water surface.
Since Grayscale (Icons) is a direct representation of the pixels used to generate your water geometry, you can think of this as a top-down view of your ocean scene. You can also see your camera from overhead, represented by a red square with two lines extending from it, and a large trapezoid, as seen in the top left image on the following page. The red dot is the camera head, and the trapezoid is the camera's field of view. FOV is the ocean area you see in Wireframe, Texture, Realistic, Too Realistic, and Depth Map modes.
You can change the camera's position with the camera's X East-West and Y North-South controls, and the camera icon will update its position in the Grayscale window. Left and right for changes in X, and up and down for changes in Y. North is at the top, and East is to the right. Changes in elevation will be noticeable as a change in the 'short' side of the trapezoid -- try it out to see. Grayscale (Icons) mode renders quickly, so you can use it to preview the motion in camera animations.
Display Image Maps
Grayscale (Icons) mode will display any Image Maps you've added to your scene. Displacement maps display as blue frames with a grayscale thumbnail of the image (the grayscale also represents the amount of displacement); Texture maps display as an empty green frame; Displace + Texture maps display as yellow frames with a grayscale thumbnail of the Image Map.
While you can't directly position Image Maps or the camera in the Grayscale (Icons) Render Mode view, you can see and render position changes you make with the Image Map and Camera position controls.
Render Mode> Wireframe mode
Wireframe displays the ocean geometry as only the outlines of the polygons which form the mesh grid used to create the ocean surface. However, be aware that the polygons in this mode do not scale with the actual polygons that make up the mesh.
Light, Air Optics, and Ocean Optics settings are all ignored, along with Image Maps used as textures. The polygons are rendered as aliased white outlines against a black background.
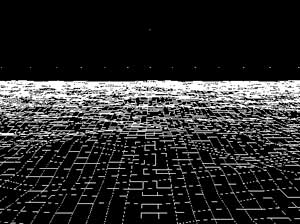
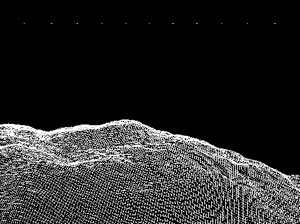
Left to right, Wireframe mode with default settings and Wireframe with camera adjustments.
Wireframe renders out light dots
Wireframe mode also renders Lights as single white dots so you can check Light position changes, and adds a series of white dots on the horizon line. The wireframe itself does not extend to the horizon.
You can use these horizon dots as references for motion tracking in After Effects or elsewhere. For example, you can motion track these dots in After Effects and derive the position and rotation of a bobbing camera in Psunami, then apply the track data to another layer so it can appear to be part of the Psunami scene.
If you use Wireframe mode for motion tracking in After Effects, you'll get the best results if you choose a dot at one end of the horizon for position tracking, and another dot on the opposite end of the horizon for rotation tracking.
Main purpose of Wireframe
The main purpose of Wireframe is to give you a reasonably fast way to see a camera animation, or to preview how changes in Primary Waves and Swells will affect the geometry mesh. Wireframe gives you an accurate representation of the true position of the camera in relation to the moving waves, which is essential when you're animating the camera close to the surface.
Because Wireframe mode isn't raytraced, but only drawn in aliased lines, it's much faster to render than the only other Render Modes which show you true geometry, Realistic and Too Realistic, so it's much easier to tell if your camera accidentally goes underwater, for example.
Render Mode> Texture (No Geometry) mode
Texture (No Geometry) is Psunami's default Render Mode, and the one you see when you first apply the plug-in.
In a 3D environment like Psunami's, the program has to keep track of every one of the potentially thousands of polygons in a typical scene, texturing and reflecting rays from the surface of each polygon as the settings in the scene dictate. This is where much of Psunami's processing overhead takes place, and is a significant contributor to longer render times.
In contrast, Texture (No Geometry) mode is designed to let you set up camera motion, Light positions and settings, water coloration, and Image Maps without the overhead of manipulating all those polygons.
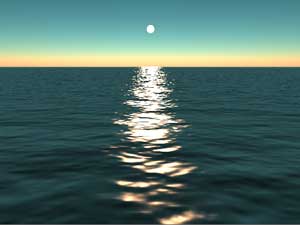
Texture (No Geometry) mode with default settings.
How Texture (No Geometry) works
In Texture (No Geometry) Render Mode, Psunami renders the ocean surface as a single flat plane, and then applies wave and ripple information as a bump map. Bump mapping is a common 3D rendering technique that uses the grayscale values in an image to shade the surface of an object during rendering, simulating the highlights and shadows that would be created by real geometry intersecting the Light rays in the scene.
In other words, the pixels in the rendered surface are shaded Lighter or darker according to the Light or dark pixels in the bump map, creating the illusion of a three-dimensional surface. Image Maps used as displacement sources will also contribute to the bump map shading, letting you test the positioning of displacement maps in the scene — although the effect is subtle. Since Psunami doesn't have to process the polygons, Texture (No Geometry) Render Mode renders significantly faster than the Realistic modes.
Texture (No Geometry) doesn't render true geometry
One disadvantage of Texture (No Geometry) Render Mode, of course, is that it doesn't render true geometry. What looks like a three-dimensional surface is only a render illusion created by the shading. As a result, the ocean surface remains perfectly flat, even when you've placed the camera right above the water
What this means is that if you're animating an ocean flyover and you want to get down close to the water, don't assume that if the camera appears to stay above water in Texture (No Geometry) mode, it will also be above the water in the Realistic modes. In fact, using the same settings that produced the image on the preceding page, setting Render Mode to Realistic produced the image below.
The image is mostly black, because the camera is actually below the water. In this case, you would have to go back into your Camera settings and adjust the camera position to keep it above the water surface (unless you want the camera to go underwater, that is).
In conclusion: Feel free to use Texture (No Geometry) to set up your Lighting and texturing. However, be sure to test camera positions and animations in Realistic or Wireframe modes before your final render.
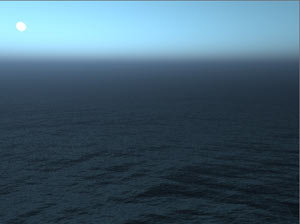
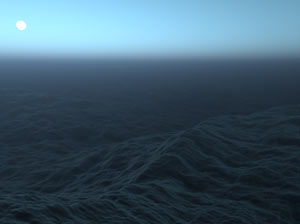
Left to right, Texture (No Geometry) and Realistic mode. You can see a true wave preview in Realistic but not Texture.
We used the Stormy Seas> In a Blue Fog preset.
Render Mode> Light Tracking mode
Light Tracking renders only the positions of Light 1 and Light 2 in your Psunami scene, ignoring all the other elements in the scene. Lights render as small white circles identically in the RGB and alpha channels. Light Tracking is intended to be used with a product like Red Giant's Knoll Lens Flare Pro to automatically apply a flare effect to the sun.

Light Tracking mode with default settings.
Use Light Tracking with Lens Flare
Light Tracking mode works great with our Lens Flare Pro plug-in, which is part of the Knoll Light Factory set. To use these plug-ins together, set the parameters in your Psunami layer to your liking, then duplicate the layer.
You should only enable one Light source when using Light Tracking mode with Lens Flare Pro; if you enable both Light sources, Lens Flare Pro will average the position of the two Light dots and place a single flare equidistant between them.
Set the second layer's Render Mode to Light Tracking, and precompose this layer, choosing the option to move all attributes into the new composition. You must precompose the layer before Lens Flare Pro can use it as a tracking source. Name the layer 'Light Track Source' or something similar, and turn off its video by clicking on the layer's eye button.
Apply Lens Flare Pro to the first layer, and set the Location Layer to the Light Track Source precomp. Lens Flare Pro will automatically track the white point in the Light Track layer's alpha channel, so your lens flare will follow the sun as it moves across the sky. Just remember to update the settings in both layers if you want to change your animation properties.
Render Mode> Realistic mode
Realistic is the setting you will normally use for rendering your final Psunami scene. This mode renders the full ocean geometry based on your property settings, so that your ocean surface is realistically displaced upward in true 3D space.
As mentioned in Texture (No Geometry) Render Mode, placing the camera near the water surface in Realistic mode lets you see correct surface displacement in 3D space, even at the horizon line.
Realistic mode also enables Psunami's full physics-based render engine with optically accurate atmospheric imaging, haze, and rainbows. For more about atmospheric settings, see the Air Optics page.
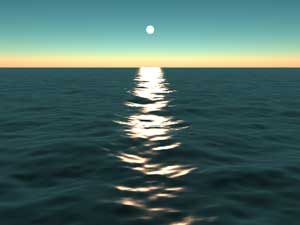
Realistic mode with default settings.
Render Mode> Too Realistic (RTM)
Too Realistic is Psunami's most precise and realistic Render Mode, and its most render-intensive. RTM stands for Read The Manual.
Realistic mode's quality is good enough for most situations. However, sometimes you need the greater render precision of Too Realistic mode, especially when you place the camera underwater looking up towards the surface. In Realistic mode, an image may look nice and smooth but not entirely realistic. In Too Realistic mode, the shading and contrast in the image look more realistic, but you'll also notice a good deal of aliased activating in the image at the edges of the Lighter areas.
One thing you will immediately notice is that a Too Realistic image is considerably darker than the Realistic image with the same settings. You can adjust this, if you want, with the Gamma Scale property in the Render Options, discussed in greater detail below. A Gamma Scale setting of 0.65 or so should compensate for Too Realistic mode's darker renders.
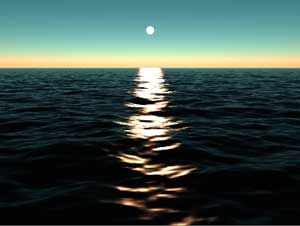
Too Realistic mode with default settings.
Setting resolution for Too Realistic
You must increase the resolution of the ocean surface mesh to get photorealistic imagery in Too Realistic mode. You can increase the resolution or fineness of the ocean mesh with the Fine Grid Size control in the Primary Waves group. To increase the resolution of the mesh, set the Fine Grid Size to a lower value. This decreases the spacing between the polygons in the mesh, thereby increasing the overall number of polygons. We go into more detail on the Primary Waves page.
The image at bottom right shows an image rendered at Too Realistic with a Fine Grid Size of 0.2. You see a much more realistic ocean surface with finer detail and smoother edges in high contrast areas. You can increase the mesh detail even further to increase the smoothness of the final render, but be aware that you're also increasing the number of polygons Psunami has to process, which will increase your render times significantly.
That's why this mode is called Too Realistic. Many Psunami users will find that the increased realism in the final image won't be worth the extra render time. You'll have to decide that for yourself.
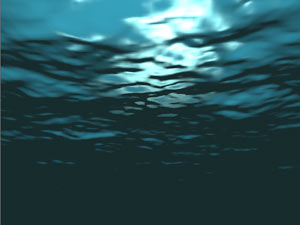
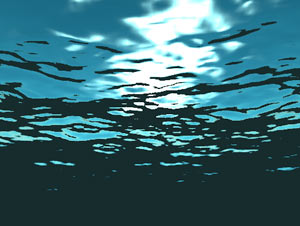
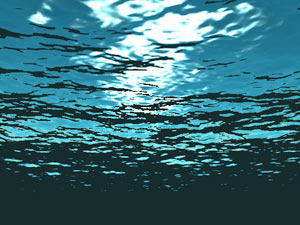
Left to right, Realistic mode, Too Realistic mode, and Too Realistic mode with Primary Waves> Fine Grid Size at 0.2.
We used the Underwater> Dark Water preset.
Render Mode> Depth Map
Depth Map mode lets you render your scene as a grayscale depth map, also known as a Z-buffer image. As the illustration below indicates, areas near the camera are rendered darker than areas farther away from the camera.
In other words, the closer a wave is to the camera, the darker it will render in the Depth Map image. By itself, this isn't all that useful, but Depth Map mode's real purpose is to create source layers for specialized effects processing of your Psunami images.

Depth Map mode with default settings.
Use Depth Map as source for Compound Blur
One use of depth maps is as a source for After Effects' Compound Blur filter, to simulate a film camera's depth of field defocusing. The Compound Blur effect blurs images based on the grayscale values of a source layer, with darker areas in the source layer causing less blur in the final image than Lighter areas.
You can use the grayscale values in the Depth Map image to progressively blur a Psunami image, so that areas of the image farther from the camera are blurrier or less in focus than areas closer to the camera.
To use Depth Map mode with After Effects' Compound Blur filter, set the wave parameters in your Psunami layer as desired, then duplicate the layer. Name the layer 'Depth Map Source' or something else appropriate. Set the Depth Map Layer's Render Mode to Depth Map, and adjust the Color Min Scale and Color Max Scale sliders. You'll find these sliders at the end of the Render Options property group.
Use Depth Map with Color Min/Max Scale
Normally Color Min Scale and Color Max Scale are used to adjust the saturation and contrast ranges of the colors in your Psunami scene. In Depth Map mode, however, you use the Color Min/Max Scale sliders to set the range, in meters, within which the Depth Map will render its grayscale values. We discuss Color Min/Max Scale in detail on this page.
In other words, Color Min Scale sets the distance from the camera where the Depth Map image will begin to transition from black to gray. Areas between the Color Min Scale and Color Max Scale values will render progressively through 256 shades of gray, from black to white. Areas outside of the Color Min Scale value will render black, and areas outside of the Color Max Scale values will render white.
Use Depth Map for compositing into scene
You can also use Psunami's Depth Map Render Mode to help you composite your own layers into the Psunami scene. As mentioned above, you can set Render What to Water Only to Max Distance in order to composite another layer into the Psunami ocean by rendering two layers, one in Air and Water mode and the other in Water Only to Max Distance mode. You then use the alpha channel in the Water Only to Max Distance layer to mask the Air and Water layer, then insert your own layer in between the two Psunami layers.
This technique is reasonably fast and easy to use, but isn't very flexible, especially when you're trying to control the edge of the foreground layer for a smoother composite. It also requires two different Psunami layers with different settings, which makes it that much slower to work with.
Use Depth Map for Compound Blur
If you're using Psunami's default values, a good starting point is Render Options> Color Min Scale of 20 and Render Options> Color Max Scale of 100.
Then precompose the Depth Map Source layer, choosing the option to move all attributes into the new composition. You must precompose the layer before Compound Blur can use it as a blur source.
Turn off the video for the precomp layer. Apply Compound Blur to the original layer, and set the Blur Layer to the Depth Map Source precomp.
Set the Maximum Blur to a relatively low value like 2 for best results. You should see a reasonably convincing depth of field blur (below left). Just remember to update the settings in both layers if you want to change your animation parameters.