Concepts to know about PlaneSpace
This page discusses important concepts to keep in mind when working with PlaneSpace Assistants.
Use two Assistants for incredible animation
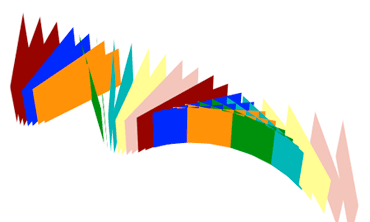
Remember that PlaneSpace was designed to assist with creating animations. There are many ways of creating interesting animations. Try using the results of one Assistant as the basis for another one.
For example, use the Spheroid Creator to create a ring of layers. Then pull those layers into one central point with the Linear Assistant. Set a keyframe. Now stretch the layers out again with the Linear Assistant. Align them next to each other along one of the axes. When you animate, the effect looks like a deck of cards unfolding. Very cool and easy to do.

Repeat Layers function (or, don’t crash your machine)
Layers need RAM. If you are just building a cube, then RAM is no big deal. In fact if you’re building half a dozen cubes, it’s probably not going to be a big deal. However, with the Repeat Layers function, it’s very easy to create hundreds of layers. REALLY easy. Don’t accidentally repeat your six layers 10 times… then repeat the resulting 60 layers, another 10 times. Be careful about Repeat Layers.
For more about Repeat Layer, see Creator Assistants, Common Parameters and Distribution Assistants, Common Parameters.
Working with layers in PlaneSpace
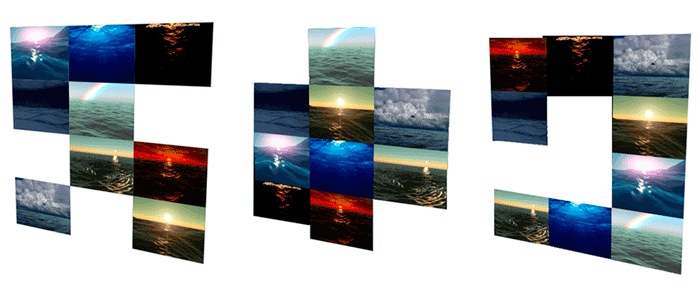
By default, PlaneSpace distribute 3D layers in the order they are arranged in the Timeline, or in the exact reverse of this order. If your animation requires a certain order to your layers, like animating several letters to spell a word, be sure to arrange your layers in the proper order on the Timeline before applying PlaneSpace.
Typically the numeric values used in PlaneSpace will represent pixels. That's how After Effects' 3D space works, so that's how we work. Some PlaneSpace parameters are measured in degrees.
When a PlaneSpace Assistant can’t use all of the layers selected, the tool will ignore the unused layers. For example, if you have 10 layers selected but you are making a 6 sided box. PlaneSpace leaves those layers untouched in their original position. Make sure they don’t get in the way by moving them or positioning the primitive away from the original layers.
Advanced 3D Renderer
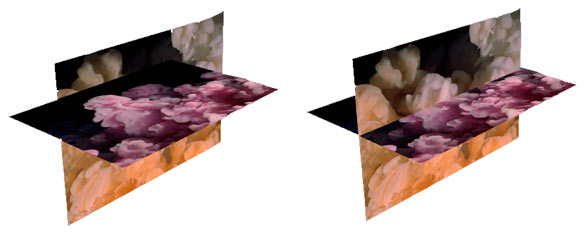
In the Advanced Composition Settings in After Effects, you will see a choice of two renderers: The Standard 3D Renderer, and the Advanced 3D Renderer.
This option should almost always be set to the Advanced 3D Renderer. If it isn’t, you will see very strange behavior if your 3D layers intersect. If your layers are not going to intersect, then the Standard 3D Renderer can be somewhat faster. However, for most work, you will want the Advanced version.
Seams & overlaps between layers
Occasionally After Effects’ Advanced 3D Renderer will render seams between layers where there shouldn’t be one. This can be particularly obvious between layers of flat color. To get rid of these seams, your layers need to overlap by a few pixels.
One way of doing this is to scale all your layers down to something like 99.5% and then place them. Once the layers have been placed by the Assistants using the smaller size, increase them to 100%. The Assistants place the layers thinking that 99.5% is their real size, so all the calculation are done with that in mind. Then when you scale everything back up to 100%, all the layers overlap, just slightly and usually enough to get rid of any unseemly seams.
Working with non-square pixels
What to do about those pesky non-square pixels? After Effects generally helps us out and we don’t have to worry about non-square pixels. At least, until we use 3D.
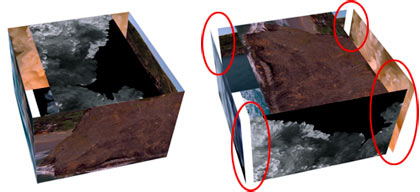
For random arrangements of layers, PlaneSpace will work fine in non-square pixel comps. But you may run into problems when using PlaneSpace with compositions and footage with non-square pixels. Especially in situations where you need layers to line up edge to edge, PlaneSpace will not always give you the desired result. After Effects compensates for the non-square pixels, but in doing so throws off the placement of 3D layers. Because the aspect ratio is different, After Effects aligns them differently than square pixel images.
Notice the gaps in the cube below at right (circled in red). Not pretty. The box at left is what the cube should look like. So how do we get that left-side box? Square pixels! Interpret your footage so it uses square pixels and make sure your comp is using square pixels. If so, the Assistants can put things together correctly without After Effects misinterpreting the pixels. Use the PlaneSpace in a composition with square pixels, and nest that comp into your non-square pixel comp.
Even with square pixels, AE’s 3D space sometimes will render gaps between layers that are perfectly aligned. You can scale your layers up slightly, set it to 100.5% (or a similar percentage) once they’ve been placed or start out with them all at 99.5% and scale them up to 100 once they’ve been placed. Which you use is up to you and will depend on how your defining the shape you’re creating.
