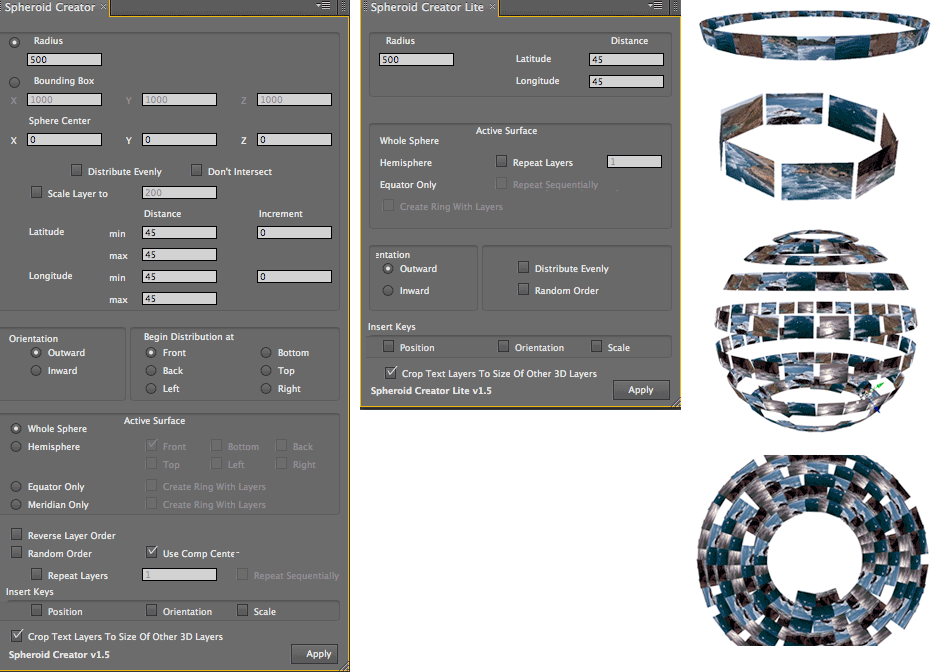
Creator Assistants: Spheroid Creator
Spheroid Creator is used for distributing layers based on the surface of sphere or ellipsoid. This is different than Spheroid Distribution, which distributes layers within a sphere.
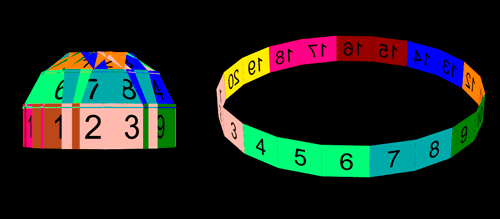
How it Works: Select the 3D layers in your composition that you wish to distribute on the surface of a sphere, and go to Window> Spheroid Creator or Lite. This creates a sphere-like arrangement. You can also create partial sphere arrangements like domes and rings of layers.
Limitations: Spheriod Creator does not create a 'perfect' sphere. There is no way to create a perfect sphere with square/rectangular polygons (or layers, in this case). The width of the polygons has to be smaller at the top or bottom and After Effects has no way of distorting layers in that way. Instead, Spheroid Creator puts the layers at a tangent to some point on the sphere, creating sphere-like arrangements. The sphere-like arrangements will have some space between the layers. To create a seamless sphere, all the layers overlap and the shape ends up looking like some sort of weird cubist sphere. If you go into the sphere, however, it looks pretty cool from the inside since you don’t see any of the overlap.

Radius, Bounding Box
Defines the dimensions (or size) of the sphere that your layers will be distributed around. The size limitation of this sphere is 1,000,000 x 1,000,000 x 1,000,000. You can determine the size of the sphere by Radius or by Bounding Box. See also: Creator Assistants, Common Parameters

Sphere Center
Defines where the center of the sphere will be located in 3D space by specifying the X, Y and Z position.
By default, a setting of 0,0,0 will result in the center of the sphere being in the upper left corner of the comp. If the Use Comp Center checkbox is selected, a setting of 0,0,0 will result in the center of the sphere being in the center of the comp.
![]()
Distribute Evenly checkbox
Results in the selected layers being distributed evenly around the surface of the sphere.
NOTE: Selecting this option disables the Latitude and Longitude settings.
See Creator Assistants, Common Parameters
Don’t Intersect checkbox
Prevent layers from being placed in a position where they would intersect other layers.
See Creator Assistants, Common Parameters
Scale Layer To checkbox
Scales all selected layers to the numeric value that is entered.
See Creator Assistants, Common Parameters
Latitude, Longitude group
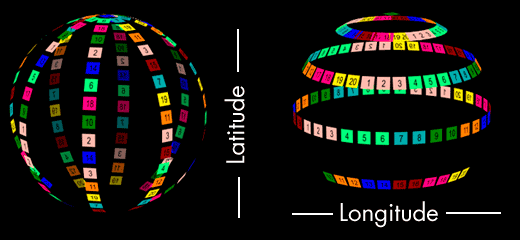
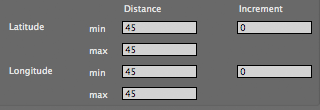
These controls determine together how far apart the layers will be distributed on the surface of the sphere. They are measured in degrees.
![]()
At left, Latitude at 30, Longitude at 10. At right, Latitude at 10, Longitude at 40.
Orientation buttons
Decides which direction the layers should orient themselves: Inward or Outward.
See Creator Assistants, Common Parameters
Begin Distribution At buttons
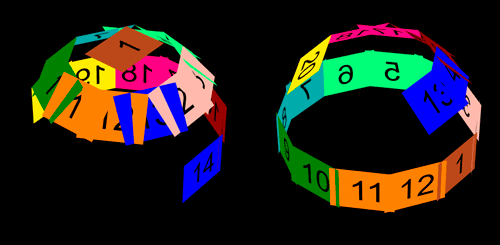
Determines at what point on the sphere the first layer will be distributed. The first layer always gets positioned on the sphere so it is aligned perfectly horizontal or vertical. The locations that layer can take are: Front, Back, Left, Right, Top or Bottom.
For each option, layer distribution starts at that location and runs the circumference of the sphere. Once it runs out of space, the Distribution moves up or down one Latitude notch and again starts to distribute the layers around the sphere. It continues to do this until it runs out of spaces to place layers or layers to place.
NOTE: If Align Surface (see below) is using a Hemisphere instead of Whole Sphere, it is best to have Begin Distribution match. If you’re using the Top Hemisphere, start the Distribution on Top; for Back Hemisphere, set Distribution to Back; and so on. This will produce the most reliable expected results. Mixing and matching the Hemisphere and Distribution can produce some cool arrangements, but if their results are not what you expected, make sure their options match.
![]()

At left, Begin Distribution is Top. At right, Begin Distribution is Front. Both use Active Surface> Top Hemisphere.
Distribution starts where you see the brown '1' layer and places layers all the way around the sphere, then moves up or down one Latitude notch.
Active Surface group
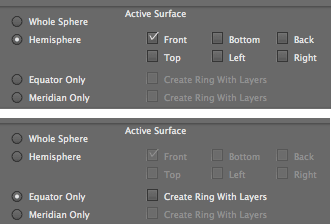
Determines which part of the sphere will be active for layer distribution. You can distribute layers across the entire sphere or only a portion of a sphere.
The Active Surface options are:
![]()
At left, sphere has a height of 120, so you see overlap between the layers. At right, sphere has a height of 240, which places the layers without seams. All layers are 320 x 240.
Insert Keys checkboxes
Three checkboxes that specify which layer properties will have a keyframe set for them: Position, Rotation and/or Scale.
See Creator Assistants, Common Parameters
Reverse Layers Order checkbox
Random Layer Order checkbox
Use Comp Center checkbox
Repeat Layers checkbox
Repeat Sequentially checkbox
Crop Text Layers to Size of Other 3D Layers checkbox
See Creator Assistants, Common Parameters