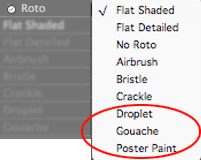
Roto Toon plug-in, Roto group 3
There are nine choices in the Roto pop-up, each of which applies a different rotoscoping algorithm to your footage. This page talks about three of the Roto options, which each create a stylized cartoon look. These options are called Droplet, Gouache and Poster Paint.
The other stylized Roto choices are called Airbrush, Bristle, and Crackle. They are discussed on this Roto Styles 2 page. For info about the three more traditional looking Roto styles, go to the Roto Styles 1 page to learn about Flat Shaded, Flat Detailed and No Roto.

There are 9 choices for the Roto pop-up box. This page covers 3 of them.
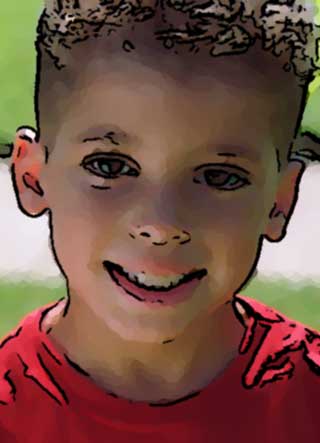
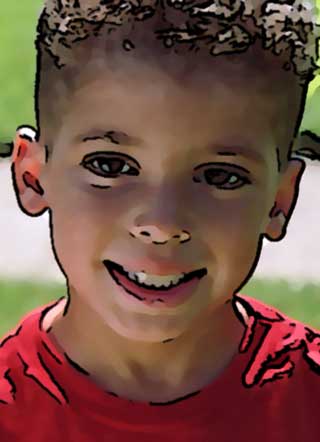
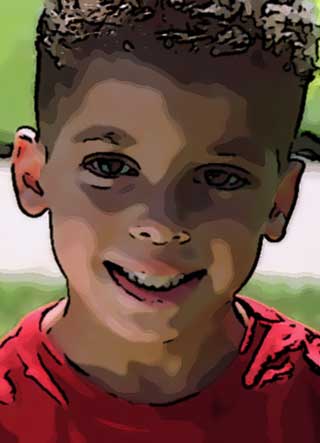
Left to right: Droplet, Gouache and Poster Paint.
Roto Style> Droplet group (NEW to v2.0)
Turned off by default. To activate, choose the Droplet style from the Roto pop-up.
Droplet simulates an expressionistic style of painting. It produces renderings that look like blobs (or 'drops') of paint have been dropped on a canvas, each spreading out in a relatively circular fashion without blending. At higher settings, Droplet gives the appearance of viewing the image behind distorted glass.

Radius
Radius controls the size of the drops. Default setting is 3. Value range is 1 to 30.
Smaller values will make the drops look like drops of paint. Larger values make the drops overlap and interact with each other, making it look more like ink or colored water. Though the slider only identifies the value as going up to 30, this setting can go up to 100 if you type in the value. However, this adds a lot of processing time and is generally not worth the visual change.
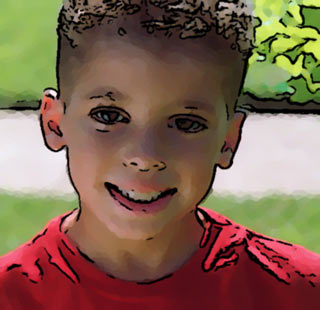
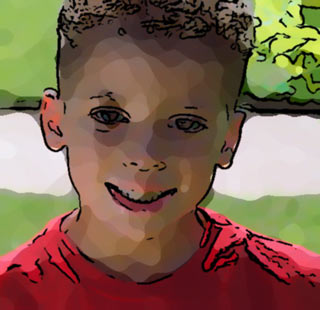
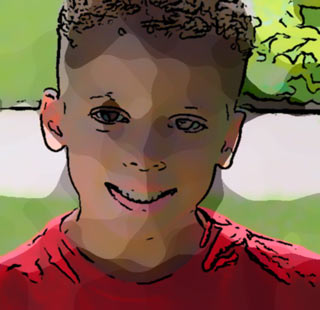
Left to right: Radius at 3 (default), 10 and 20.
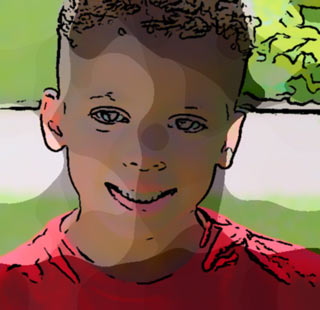
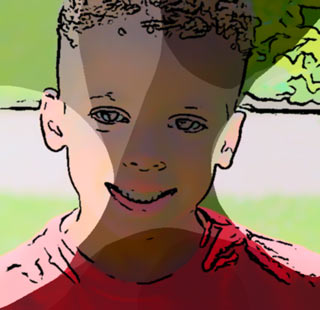
Left to right: Radius at 30 and 100. Higher values generally aren't worth the render time.
Strength
Strength controls the definition between the dark, mid-tone and highlight segments. It’s essentially adjusting the contrast for each individual color region independently from the other color regions.
Default setting is 0.85. Value range is 0 to 5. The functional range is really from about 0.5 to 1.5. Strength is a setting that you should adjust very incrementally. At higher values, it produces wild artifacts which are usually undesirable. The bulk of work in Droplet should be performed by adjusting Radius.
The higher this value is, the more distinct the darks and lights will be from each other. At lower values, the darks and lights becomes more blended together, and the image gets brighter overall and loses more contrast.
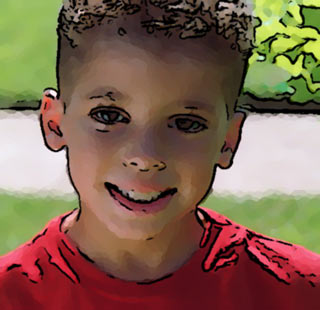
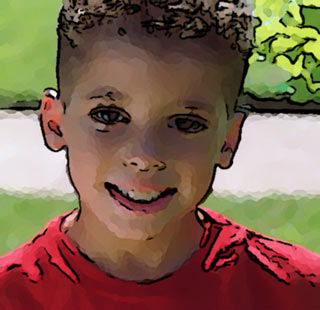
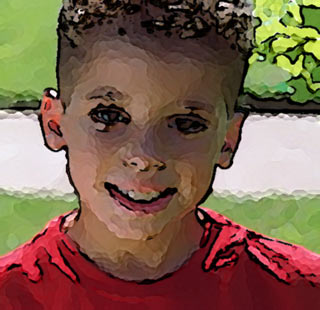
Left to right: Strength at 1, 1.5 and 3. Higher values can introduce interesting results but strange artifacts.
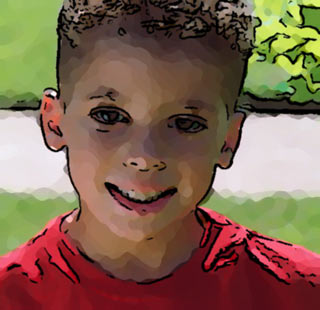
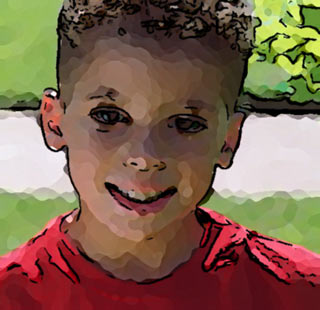
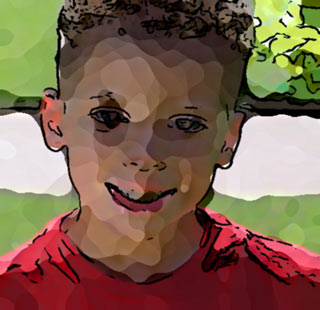
At left, Strength at 1, Radius at 5. In middle, Strength at 1.5, Radius at 5. At left, Strength at 1.5, Radius at 10.
Droplet and Main Blur group
Turning off the Main Blur group for Droplet can sometimes result in a better effect. This is because Droplet changes the borders between different-colored regions of an image, adding rounded bumps where blobs of paint appear to have been extruded and indented. Again, Droplet can work and look better if Main Blur is turned off, but this is not always true, so adjust to taste. You would do so by unchecking the Use Main Blur control.
These changed borders frequently don’t align with the Outline types, so you’ll probably want to keep any Outline stylized effects turned off. By Outline effects, we mean Woodcut Outlines, Conte Outlines, etc. You will generally want to have either Comic Outlines or Soft Outlines turned on, since they create the dark lines of the cartoon image using the Outline Color control.
Roto Style> Gouache group (NEW to v2.0)
Turned off by default. To activate, choose the Gouache style from the Roto pop-up.
Gouache simulates the smooth brushwork style of gouache painting. Traditional gouache paint is a water-based medium that looks like thick, opaque, gummy watercolor.
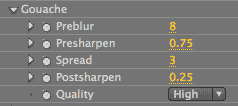
Comparison of Bristle and Gouache
The Gouache style is related to the Bristle style, but there are some basic differences. Gouache has a smoother look, while Bristle has a rougher look. Bristle and Gouache also have differences in 'paint dab' size, as the Gouache dabs are generally bigger. The Bristle paint looks more locally textured, like applying paint using the side of a sable brush vs. the end of a bristle brush. Both can produce effects that look cool and artistic. Their settings (Presharpen, Spread and Postsharpen) behave in a similar fashion.
Preblur
Gouache uses its own specialized blur, called the Preblur. This defines the 'radius', or size of the area in an original video frame whose pixel colors are blended and smoothed together. Preblur works similar to the Radius control in the Main Blur group. Because of this Preblur control, Gouache should usually be used with Use Main Blur turned off, although that group can be added for extra smoothness.
Default setting is 8. Value range is 1 to 50. Higher values will smooth out the segment edges between the dark, midtone and highlight colors. Lower values create more defined segments because there is less blending.
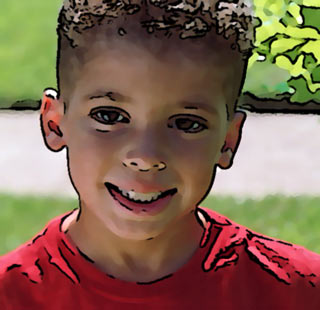
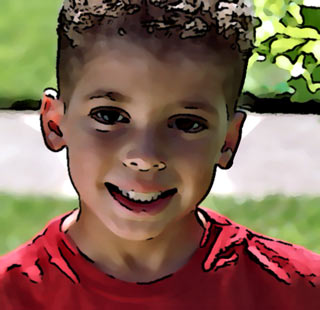
Left to right: Preblur at 8 (default) and 40.
Presharpen
Presharpen sharpens the underlying image before the Bristle effect is applied. This setting tends to set the look of the brushstrokes. It creates a light segmentation effect, much like small, almost perfectly blended dabs of paint.
Default setting is 0.75. Value range is 0 to 10. Lower values make the Gouache effect look softer. Higher values result in a more-defined, harder-edged brushstroke.
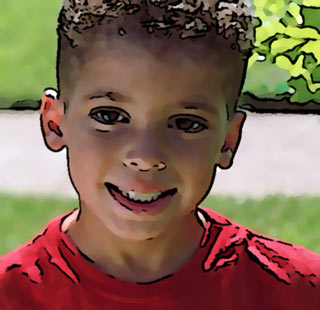
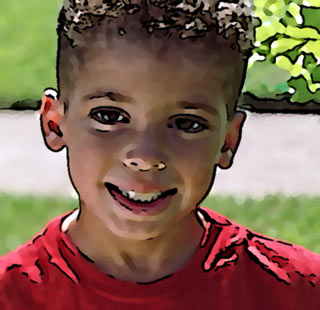
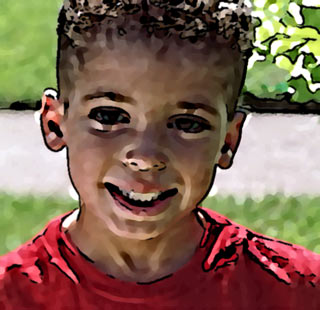
Left to right: Presharpen at 0.75 (default), 2 and 5. Higher values have more-defined paint dabs.
Spread
Sets the size of the brush strokes or 'paint dabs'. Default setting is 3. Value range is 1 to 25. Low to medium values usually produce the best results.

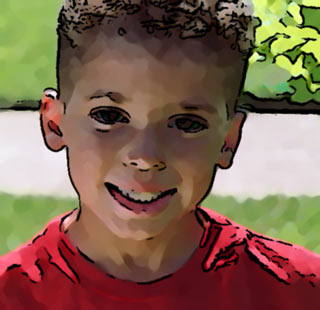
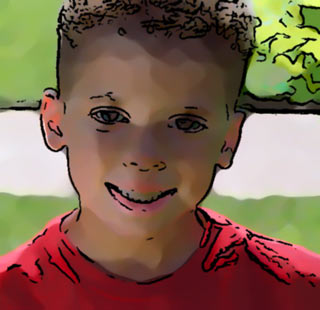
Left to right: Spread at 3 (default), 8 and 15. Presharpen is at 2. Higher values look less paint-like.
Postsharpen
Applies sharpening to the image after the Gouache effect is applied. Postsharpen creates a contrast between the colors within the brush strokes. This is similar to the Strength setting in other styles (like Flat Shaded), as it makes the separation between the dark, midtone and highlight segments more or less defined. Postsharpen increases difference of the rendered output from the Preblur results.
Default setting is 4. Value range is 0 to 4. Higher values make the dabs appear rougher and more prominent.
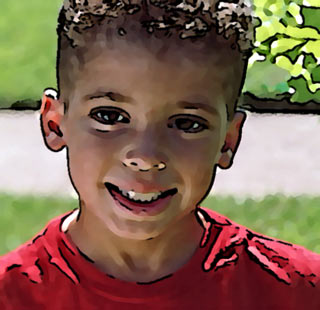
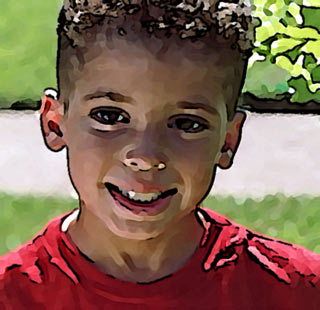
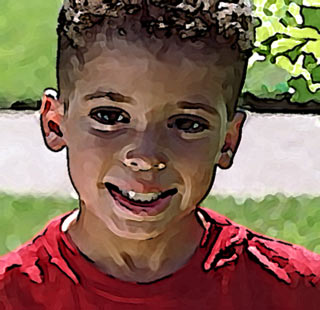
Left to right: Postsharpen at 0.5, 2 and 4 (default). Presharpen is at 2. Higher values make the paint dabs more prominent.
Quality pop-up
Determines the quality of the Gouache effect, or basically the amount of detail that is affected by any setting. The pop-up menu has two options, a Fast Quality and High Quality. Set it to Fast for better interaction while adjusting your settings. Always set it to High before rendering the image for final output.
Gouache and Main Blur group
Turning off the Main Blur group for Gouache can sometimes result in a better effect. You would do so by unchecking the Use Main Blur control. This is because Droplet changes the borders between different colored-regions of an image, adding rounded bumps where blobs of paint appear to have been extruded and indented. Again, Gouache can work and look better if Main Blur is turned off, but this is not always the case, so adjust to taste.
These changed borders frequently don’t align with the Outline types, so you’ll probably want to keep any Outline stylized effects turned off. By Outline effects, we mean Woodcut Outlines, Conte Outlines, etc. You will generally want to have either Comic Outlines or Soft Outlines turned on, since they create the dark lines of the cartoon image using the Outline Color control.
Roto Style> Poster Paint group (NEW to v2.0)
Turned off by default. To activate, choose the Poster Paint style from the Roto pop-up.
Poster Paint is like the conventional Posterize effect with several terrific enhancements. It combines the results of two different posterize algorithms to make a more adaptable and naturalistic rendering. Poster Paint analyses the complexity of the image to make an educated guess about what areas are foreground versus background. This allows Poster Paint to selectively blur objects in the background, making them less noisy and/or distracting.
Posterization is a generally less attractive way of creating a cartoon effect (as compared to our Flat-Shaded rotoscoping, for instance). However, it does create a specific stylized effect, which might be what you’re looking for. It is also great for tooning footage with changing or extreme lighting conditions. By combining two posterize variations, you get that style plus the ability to add in additional detail.
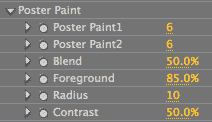
Poster Paint1
Poster Paint1 sets the number of levels in the first posterize algorithm. (We explained above that PosterPaint combines two posterize passes.) If you set the Blend control to 0, you’ll see what Poster Paint1 looks like by itself.
Default setting is 6. Value range is 2 to 25. Higher values break down the footage into more levels or gradations of color.
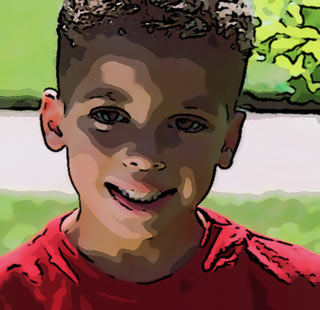
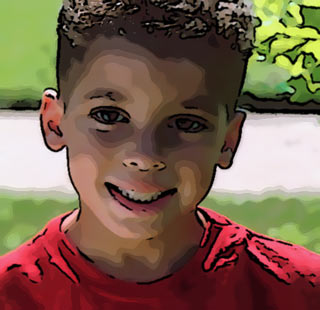
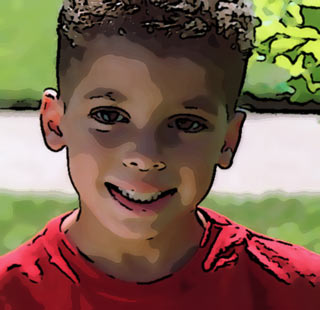
Left to right: Poster Paint1 at 2, 6 (default) and 20.
Poster Paint2
Poster Paint2 sets the number of levels in the second posterize algorithm. If you set the Blend control to 100, you’ll see what Poster Paint2 looks like by itself.
Default setting is 6. Value range is 2 to 25. As with Poster Paint1, higher values break down the footage into more levels or gradations of color.
What's the difference between Poster Paint1 and Poster Paint2? One Poster Paint will often create a slightly darker posterization than the other, and those results blend together. Whether Poster Paint2 creates a darker or lighter posterization than Poster1 totally depends on the image. There will always be two levels corresponding to light and dark parts of an image. If the total image is dark, both levels will be dark -- a lighter dark and a darker dark. If the total image is light, then both levels will be light -- a lighter light and a darker light. The way Poster1 and Poster2 mix their results is a bit complicated, but the rendered output is gorgeous and easy to understand.
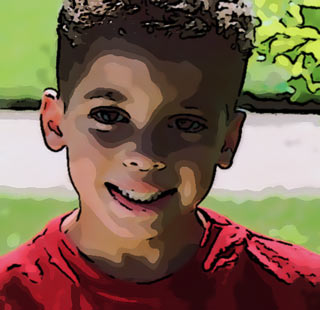

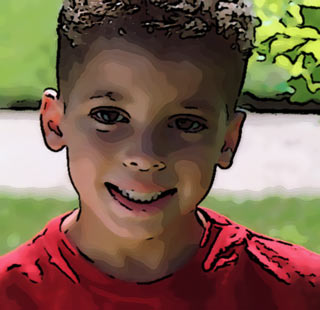
Left to right: Poster Paint2 at 2, 6 (default) and 20.
Blend
Poster Paint Blend controls the proportion of Poster1 and Poster2 output in the render.
Default setting is 50. Value range is 0 to 100. The lower the value, the more of Poster1 you will see. At a Blend value of 0, you see pure Poster1. The higher the value, the more of Poster2 comes through. At a Blend value of 100, you see pure Poster2.
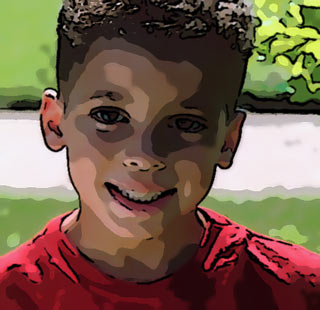

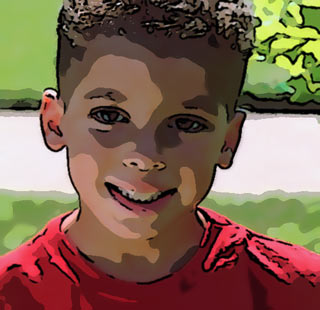
Left to right: Blend at 0, 50 (default) and 100. Blend 0 shows Poster1. Blend 100 shows Poster2.
Foreground
Foreground adjusts the sensitivity of the complexity analysis. (We mentioned above that Poster Paint figures out the foreground from background in your image.) This control is fairly sensitive and is generally best if left at the default value.
Default setting is 85. Value range is 0 to 100. When Foreground is maxed at 100, all parts of the image are treated as foreground and nothing is blurred. When Foreground is at 0, everything is treated as background and blurred, producing a look something like No Roto with Main Blur turned on.
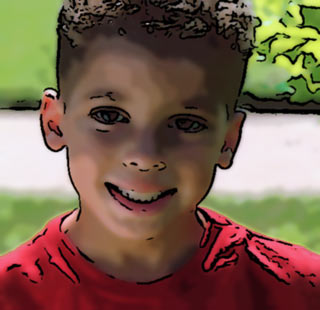

Left to right: Foreground at 0 and 85 (default).
Radius
Radius adjusts the radius of the background blur. This kind of control can be used to compensate for larger images. The 'radius' is the size of the sample image area whose pixel colors are blended and smoothed together.
Default setting is 10. Value range is 1 to 50. Though the slider only identifies the value as going up to 50, this setting can go up to 100 if you type in the value. Setting Radius that high will increase render time so you need to determine if the visual difference is worthwhile. Higher values will smooth out the segment edges between the dark, midtone and highlight colors. Lower values create more defined segments because there is less blending.
Contrast
Contrast increases the spread between color minimum and color maximum in rendered output. Its effect ranges from full black through full white.
Default setting is 50. Value range is 0 to 100. Higher values will add black, which darkens the footage.
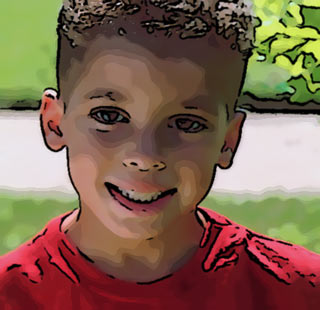

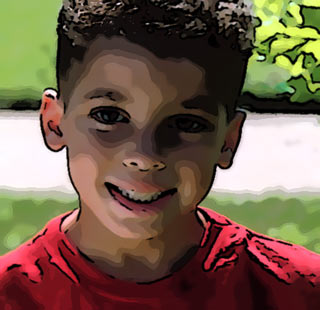
Left to right: Contrast at 10, 50 (default) and 100.