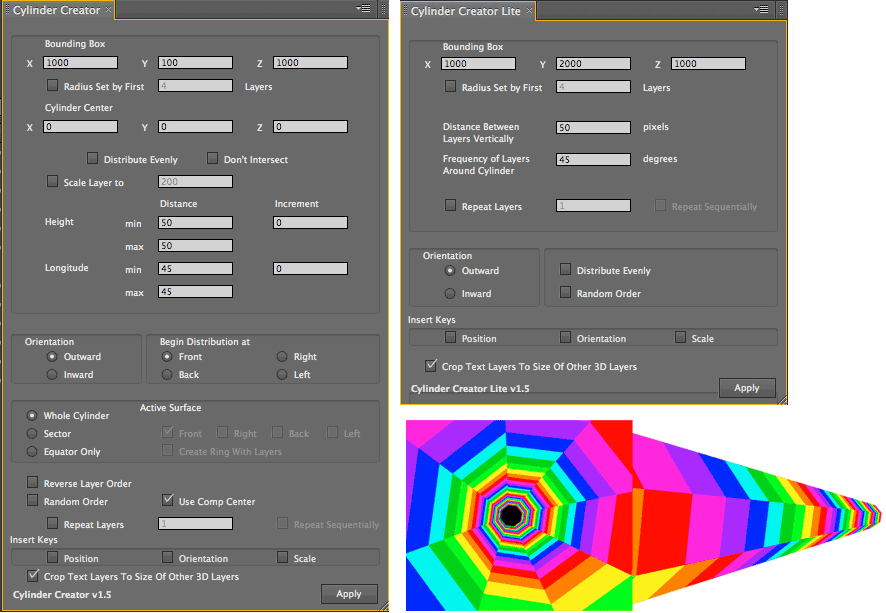
Creator Assistants: Cylinder Creator
Cylinder Creator is used for distributing layers based on the surface of a cylinder. It is not to be confused with Cylinder Distribution, which distributes layers within and around a cylindrically shaped area.
How it Works: Select the 3D layers in your composition that you wish to distribute on the surface of a sphere, and go to Window> Cylinder Creator or Lite. This will create a cylinder based on the layers you give it. It arranges the layers in a circle with a given radius, and then stacks the rings of layers to form the cylinder. This works best if all the layers have the same width. Otherwise, the tool can’t keep all the layers inline and the cylinder ends up being a hodge podge of rings. This may be fine, but if not, make sure everything is the same width.

To create this spiraling Cylinder tunnel, we used 9 layers and set Radius Set By First to 8.
Bounding Box
Defines the dimensions (or size) of the cylinder that your layers will be distributed around.
See Creator Assistants, Common Parameters
Radius Set By First checkbox
Determines the radius of the cylinder by looking at the first several layers in the Timeline. The exact number of layers used is set by the value field. For example if you set Radius Set By First to 5, the first 5 layers in the Timeline will determine the radius of the first ring in the cylinder. This first ring sets the radius for the cylinder, and all subsequent rings of layers will approximately be this size.
This checkbox is particularly effective when all the layers have the same width. The rings are all the same size and all their layers are the same distance from each other. If the layers are different sizes, then there’s no way to create a 'perfect' cylinder and you will see gaps between layers.
NOTE: This checkbox turns off Longitude (see below) and Active Surface> Equator Only (see below). This is because layer orientation is determined by the size of the radius based on the number of layers.
![]()
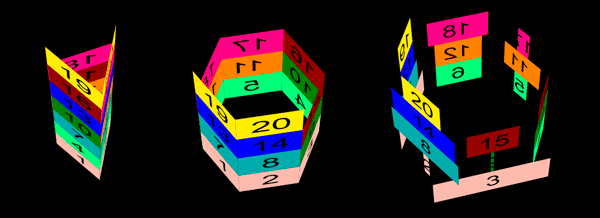
At left, Radius of 3 layers all equally sized. In middle, Radius of 6 layers all equally sized.
At right, Radius of 6 layers of all different sizes, which results in gaps and other unevenness.
Cylinder Center
Defines where the center of the cylinder will be located in 3D space by specifying the X, Y and Z position.
By default, a setting of 0,0,0 will result in the center of the cylinder being in the upper left corner of the comp. If the Use Comp Center checkbox is selected, a setting of 0,0,0 will result in the center of the sphere being in the center of the comp.
![]()
Distribute Evenly checkbox
Results in the selected layers being distributed evenly around the surface of the sphere.
NOTE: Selecting this option disables the Height and Longitude settings.
See Creator Assistants, Common Parameters
Don’t Intersect checkbox
Prevent layers from being placed in a position where they would intersect other layers.
See Creator Assistants, Common Parameters
Scale Layer To checkbox
Scales all selected layers to the numeric value that is entered.
See Creator Assistants, Common Parameters
Height, Longitude group
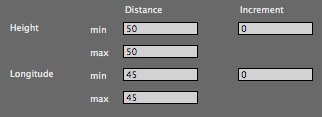
These controls determine together how far apart the layers will be distributed on the surface of the cylinder. They are measured in degrees.
NOTE: Longitude gets turned off if Radius Is Set By is turned on. This is because the radius is determined by how many layers are selected. In that case the angle is going to be determined by the size of the layers and how many of them there are.
![]()
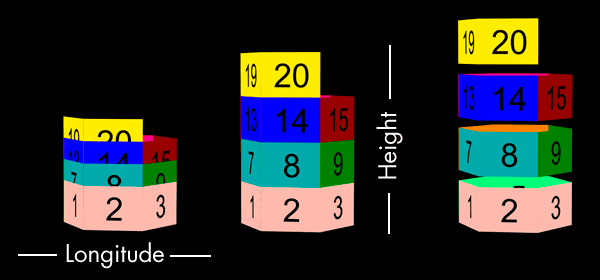
All layers are 320 x 240. At left, Height at 120 causes overlap between layers. In middle, Height at 240 places the layers without any seams. At right, Height at 300 causes gaps.

At left, Longitude Min/Max at 30. In middle, Longitude Min/Max at 45. On right, Longitude Min at 20, Max at 75.
Orientation buttons
Decides which direction the layers should orient themselves: Inward or Outward.
See Creator Assistants, Common Parameters
Begin Distribution At buttons
Determines at what point on the sphere the first layer will be distributed. The first layer always gets positioned on the sphere so it is aligned perfectly horizontal or vertical. The locations that layer can take are: Front, Back, Left or Right.
For each option, layer distribution starts at that location and runs the circumference of the cylinder. Once it runs out of space, the Distribution moves up or down one Latitude notch and again starts to distribute the layers around the cylinder. It continues to do this until it runs out of spaces to place layers or layers to place.
NOTE: If Align Surface (see below) is using a Sector instead of Whole Cylinder, it is best to have Begin Distribution match. If you’re using the Front Sector, start the Distribution on Top; for Right Sector, set Distribution to Right; and so on. This will produce the most reliable expected results. Mixing and matching the Hemisphere and Distribution can produce some cool arrangements, but if their results are not what you expected, make sure their options match.

Active Surface group
Determines which part of the cylinder will be active for layer distribution. You can distribute layers across the entire cylinder or only a portion of a cylinder. The Active Surface options are:

The Active Surface options are:
NOTE: Equator Only and Create Ring With Layers are grayed out if Radius Set By First (see above) is active. Together they have similar results as Radius Set By First, but only create one ring, no matter how many layers are present.
Insert Keys checkboxes
Three checkboxes that specify which layer properties will have a keyframe set for them: Position, Rotation and/or Scale.
See Creator Assistants, Common Parameters
Reverse Layers Order checkbox
Random Layer Order checkbox
Use Comp Center checkbox
Repeat Layers checkbox
Crop Text Layers to Size of Other 3D Layers checkbox
See Creator Assistants, Common Parameters