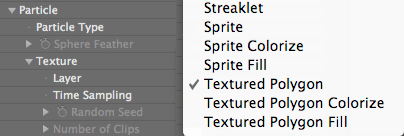
Particle group> Texture group
When a Sprite or Textured Polygon type is active, you can create custom particles. The ability to use custom particles provides infinite flexibility in producing particle effects. You can load in logos, text or movie clips as the source shape, and the Form grid will be made up of particles from each frame of the movie. The possibilities are endless.
The Texture group lets you select a layer in your Timeline to load in as the custom particle. You can use a bitmap image, shape layer, text layer, movie or pre-comp. The Texture group also sets the custom particle's behavior, like which frame of a pre-comp to sample from.
Form 1.0 Note: The Texture group used to be called Custom group. Its parameters work much the same as before, with some interesting additions.
![]()
![]()
Texture group and the custom particle types.
Guideline for using custom particles
We recommend that you keep the layer size as small as possible, at no larger than 100x100 pixels if possible. A good guideline is to keep the custom particle layer no larger than the largest visible particle. If the custom particle layer is larger then you will get long render times because Form has to resize and position these large particles.
If there are any effects or masks applied to the custom particle layer, it needs to be pre-composed (Layer> Pre-Compose). A text layer has to be pre-comped. If the effects are complex, it is a good idea to pre-render the particle to a movie file and then bring this pre-rendered movie into the composition.
NOTE: When the custom particle layer and the Form layer overlap in the Timeline, the particles will appear. We recommend starting both layers at the same time marker in the Timeline.
Layer pop-up
Chooses the layer that will be used as a 'texture' or custom particle. All Texture parameters treat the layer as the particle source.
By default, the Layer pop-up is set to None and turned off. To turn it on, choose a layer. This layer has to be in your Timeline and the View (eye icon) should be turned off for that layer. If you try to apply a layer that is really large, an After Effects warning message will appear that tells you to use a smaller layer.
![]()
![]()
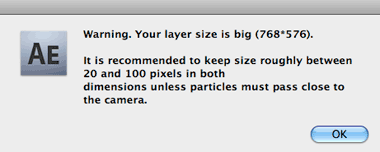
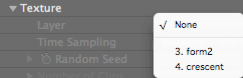
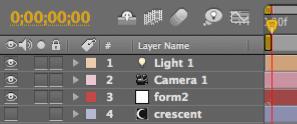
At left, Layer pop-up shows all available layers. In middle, those layers are in the Timeline. At right, an AE warning box.

![]()
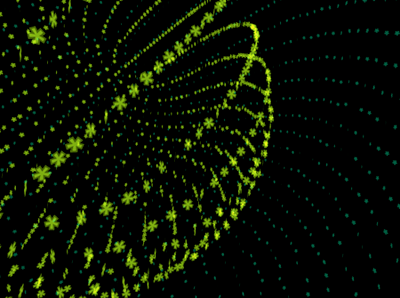
At left, an 'astrick' bitmap image. At right, the astrick loaded as custom particles.
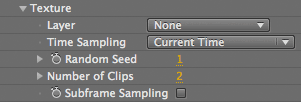
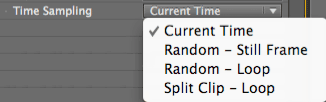
Time Sampling pop-up
Determines which frame of the layer is sampled to generate the custom particle. The mode that you choose determines which frame the custom particle is sampled from with options for starting from the first frame, picking a random frame, or splitting the layer source into multiple clips.
Time Sampling should generally be set to the default Current Time option. This will speed up rendering because the same frame of the layer is used for all particles in the current frame. When using an animated particle, the other modes are useful as they can drastically reduce the time needed to pre-render the custom particle layer.
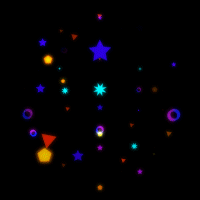
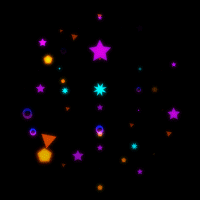
Random Still example We applied Time Sampling to a simple Sphere form with 10 Particles in X and 10 Particles in Y. In this example, Time Sampling is set to Random Still Frame. Each particle is a single random frame from the movie above and does not change. |
Random Loop example In this example, Time Sampling is set to Random Loop. Each particle starts at a random frame from the movie above and changes constantly so the animation is much more chaotic. |
Split Clip example In this example, Time Sampling is set to Split Clip - Loop and Number of Clips is 5. Each particle starts randomly at 0, 1, 2, 3 or 4 seconds into the source movie, and only changes by using 1 second of the source movie as a particle. The motion is more random than our first example, but less than our second, because the shapes stay the same in the second loop. |
Random Seed
Randomizes which frame is sampled from without changing the positions of the particles. Active when either Random option is chosen in Time Sampling.
Number of Clips
Defines the number of clips in the custom layer that Split Clip uses. Active when the Split Clip mode is chosen in Time Sampling.
For example, you may have 5 movies that are 10 frames each in a pre-comp. You can select a Split Clip mode and set Number of Clips to 5. This will tell Form to use only one of the 5 clips as the custom particle.
Subframe Sampling checkbox
Subframe Sampling lets you sample frames between two frames from the custom particle layer. Active when Still Frame mode is chosen in Time Sampling. This effect is more obvious and functional when Motion Blur is turned on.