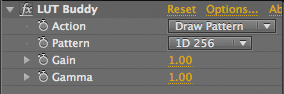
Interface controls for LUT Buddy
The LUT Buddy interface is very simple to use. One pop-up control sets a read/write function and another pop-up chooses the LUT type.
Action pop-up
Action is where LUT Buddy really happens with a combination of Draw Pattern and Read Pattern. Drawing then Reading creates a LUT based on any arbitrary color operation you might perform. You can even include an instance of LUT Buddy applying a LUT in the mix if you want to.
Following the pattern being drawn, you apply any effects that will perform color operations. It is very important that none of these effects cause any inter-pixel transformations such as a blur. The pattern must remain in place and un-filtered.
IMPORTANT: Once both instances of LUT Buddy are applied to a footage layer, Draw Pattern and Read Pattern need to point to the same Pattern choice. For instance, you need to Draw a 1D 256 and Read a 1D 256. If you don't Draw/Read to the same dimensions, LUT Buddy will result in garbage output or some other weirdness. Read our Step-by-Step Tutorial for more details.
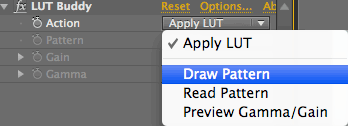
There are four Action options:
• Apply a LUT: When Action is set to Apply LUT and a LUT is loaded, the LUT will be applied to your footage layer. If no LUT is loaded, nothing will happen. Pretty much what you expect, right?
• Draw Pattern: Choose Draw Pattern to stamp one of the LUT Buddy patterns onto a layer. Drawing is applied to the first instance of LUT Buddy and starts the process of using the tool.
• Read Pattern: Choose Read Pattern after you have Drawn a pattern and performed your color operations. Finally, add another instance of LUT Buddy at the end with the Action set to Read Pattern and the pattern set to the same value as the one drawn. Every time the frame is rendered, this pattern will be read into memory and the LUT will be stored. The LUT’s bit depth is determined by the depth of your After Effects/FCP project. Once stored, you can click the LUT button to save out a LUT file.
• Preview Gamma/Gain: Helps you decide what settings might be best used in Gain and Gamma sliders. Your goal should be to bring the highlights of the image into visible range (using Gain) and then make details uniformly visible (using Gamma). When it looks good, set the Action back to Draw Pattern and the pattern will reflect your changes.
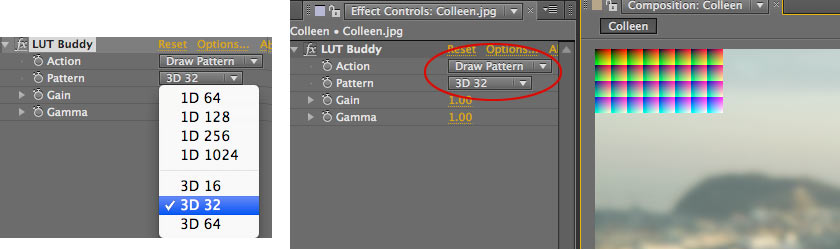
Pattern pop-up
Set the Pattern to determine the type and size of LUT that is created. LUT Buddy draws its LUT values as a pattern on your footage, then that pattern is read back from exactly those pixel positions.
A visual depiction of the LUT will appear at the top left of your footage. For 3D LUTs, you will see a colorful rows of pattern patches (see below). For 1D LUTs, you will see a single line grayscale strip. This strip is more difficult to see; typically, you will need to zoom into the Preview Window.
There are four 1D LUT choices and three 3D LUT choices. The LUT Types are explained on this page.
IMPORTANT: Make sure your footage is large enough to accommodate the full pattern you are drawing.
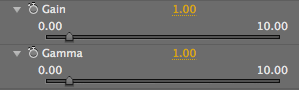
Gain, Gamma sliders
In general, the patterns that are drawn and read are restricted to the range between black and white, as most LUTs are. But there are times when you want to capture what a certain color operation is doing in the overbrights, and that's what Gamma and Gain controls are for. You will probably want to use these settings when your project is in 32-bit floating point mode.
• Gain slider: Affects midtone values. Use this slider to make details uniformly visible. Default value is 1.0, which creates no effect. Value range is 0.0 to 10.
• Gamma slider: Affects highlights. Use this slider to bring the highlights of the image into visible range. Default value is 1.0, which creates no effect. Value range is 0.0 to 10.
Some notes about Gain and Gamma: