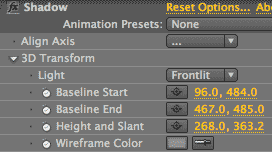
RG Shadow plug-in: 3D Transform group
The 3D Transform group holds all of the basic ingredients for your Shadow effect. The Light control tells the shadow which direction to go. Three primary controls set the Start, End and Slant alignment of the shadow to the image layer. A fourth alignment control, Align Axis, sets the Start and End points in a precise pre-fab alignment.

Align Axis pop-up
You can look at Align Axis as a controller for other controls in the plug-in. Align Axis chooses a particular location to set the Start and End values. The baseline that connects those values is displayed along with the Height/Slant line. This is a convenient quick way to exactly align the shadow to a side of the source image it is shadowing. There are four alignment choices: Bottom, Top, Left and Right.

If you choose Top, the shadow goes exactly to the top of the boundaries of the source layer's alpha. Choose Left to precisely align it to the left side of the layer alpha. This lets you get perfect alignment and not wonder if that pixel is exactly where the edge is. It's a great tool for designating a particular area as where the start, end and height/slant controls are going to be set.
In fact, when you first apply the Shadow plug-in, you will most likely go immediately to Align Axis, set Align to Bottom, and then pull out the Height/Slant value. Also if you've mucked around and things don't look good, hit Reset, then go to Align Axis to start all over again. NOTE: When you choose Align Axis, the Height/Slant is reset to its default of pointing straight downwards for Backlit and upwards for Frontlit. This can be a little annoying, although easy to fix, but it's a behavior to keep in mind.
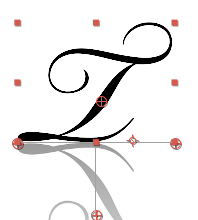
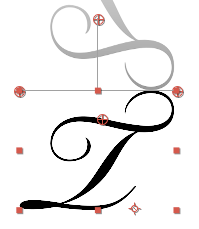
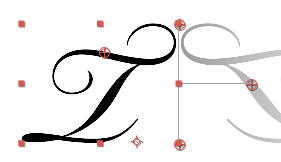
Left to right: Align Axis> Bottom, Top and Right options.
Light pop-up
It's important to choose the shadow direction that makes sense for your composition. The Light that casts this shadow can be defined as Frontlit or Backlit. With a click of your popup, the Light can quickly move between opposite directions. In setting this control, you are are moving the alpha of the shadow around but keeping the baseline of the shadow in the same location.
![]()
By default, Light is set to Frontlit. This means that when you first start a composition, the shadow sits behind the source image. Below right, you can see that Frontlit makes the shadow behave as if the light is coming in from in front of the subject.
If we change Light to Backlit, the shadow behaves as if the light is behind the subject. This behavior is aided by the default Transfer Mode called Based on Light. (See Blend group> Transfer Modes.)
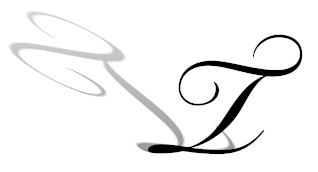
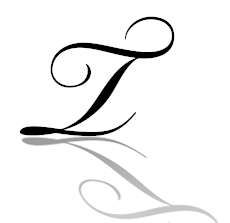
At left, the shadow is Frontlit (the default). At right, our letter T is set to a Backlit shadow.
About the Shadow baseline
For the Shadow plug-in, the term 'baseline' has two different meanings. Baseline refers to both a control and to a visual characteristic. The term baseline refers to the invisible ground line that the source image sits on. Baseline also refers to the wireframe line that connects the points of the Start, End and Height/Slant controls.
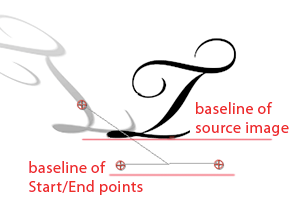
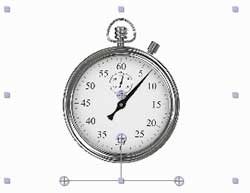
By default, when Shadow is first applied to your source image, the shadow and its baseline begin at the bottom of your source image. For our stopwatch, therefore, the shadow sets itself at the bottom of the bounding box of the image. We can change the baseline's position by dragging the wireframe line upwards to the bottom of the stopwatch.
The stopwatch graphic was imported with an alpha channel. That alpha is recognized by the Shadow plug-in and the shadow resets itself to the new baseline. The 'L' is a text character created with the text tool and has a built-in alpha channel. The L shape's baseline is at the base of the letter, along its lower horizontal line. (Read more about alpha behavior in Shadow Look > Shadow Source.)
If you move the baseline, you can see that the shadow looks like it is above the plane that it's sitting on. If you have the shadow perfectly aligned with the bottom of the image, then the shadow looks like it is sitting on the same plane.
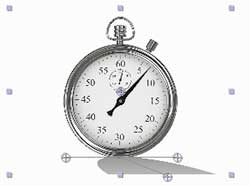
At left, the shadow defaults to the bottom of the source image. At right, we've moved the wireframe baseline to the same point as the visual baseline of the source image.
Baseline Start, Baseline End
These controls set where the shadow starts and where it's going to fall. The Start and End points are connected by a wireframe line, which we will call the 'baseline.' This wireframe also connects the Start and End points to the Height/Slant control. Because these three controls are connected, moving the Start or End point will also adjust the Height/Slant point.

If your shadow is perfectly aligned to the baseline of the source image, the shadow will appear to come directly from the object. You can move the baseline to make it look like the object is separated by the light source. The left-side point is the Start point. The right-side point is the End point.
There are multiple ways to move these points around. You can click directly on each point in the Preview Window to move them around. You can click on the baseline wire to move the Start and End points together. Alternately, you can input specific X and Y values into the numeric fields in the Effects menu. You can also click into the cross-hair field of each control in the Effects menu, then click/drag the point in the Preview Window.
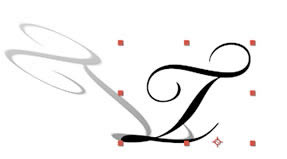
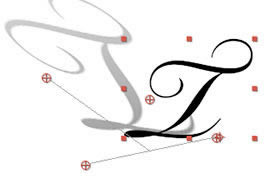
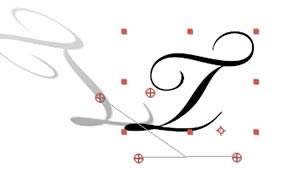
At left, the three points are in their default locations. In middle, we have moved the Start point to bottom left. At right, we've lowered the baseline that connects the Start and End points.
Start and End are fun controls to work with as they really set the visual feeling of the shadow. Pull a point to the left to move the shadow to the right. Pull a point to the right to move the shadow to the left. Pull a point upwards or downwards to move the shadow along the source image's baseline.
The farther the point is pulled out, the more slanted (or oblique) the shadow becomes in relation to the image. This emulates the light source casting the shadow way over to the right. When the point is closer to the center of the image, there is more of a frontal shadow that is cast, which makes the shadow seem as if it's standing straight up.
Height/Slant
Another primary control that determines how the shadow is going to fall. It sets the origin of the shadow, its direction, and where it ends.
When you pull the Height/Slant point in any direction, the shadow will follow that direction precisely. Move Height/Slant to the right and the shadow skews to the right. Move Height/Slant upwards and the shadow will get longer. Move Height/Slant to the top right and the shadow will elongate towards the right.
As you move the Start and End points, you will also notice that the Height/Slant point moves along with them. This is because all three controls are connected through the wireframe line. Maintaining them together keeps the realism of the effect of the simulated light source.
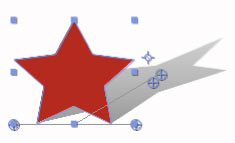
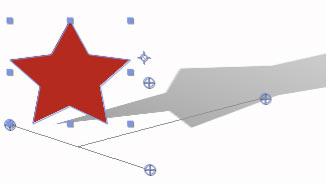
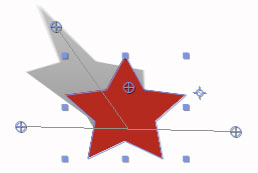
At left, Height/Slant at right. In middle, Height/Slant pulled downwards. At right, Height/Slant moved to top left.
Wireframe Color
Gives you control over the color of the wireframe, which can be helpful in certain circumstances. If you're working on a gray background, it may be difficult to see a gray wireframe line. Change the wireframe color to something brighter for a better workflow.
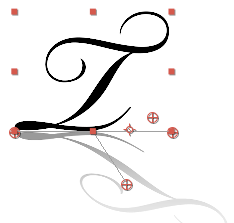
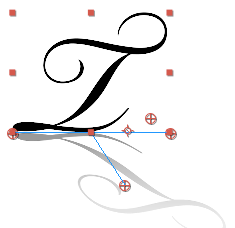
Changing the color of the wireframe from default gray to blue makes the wireframe easier to see.