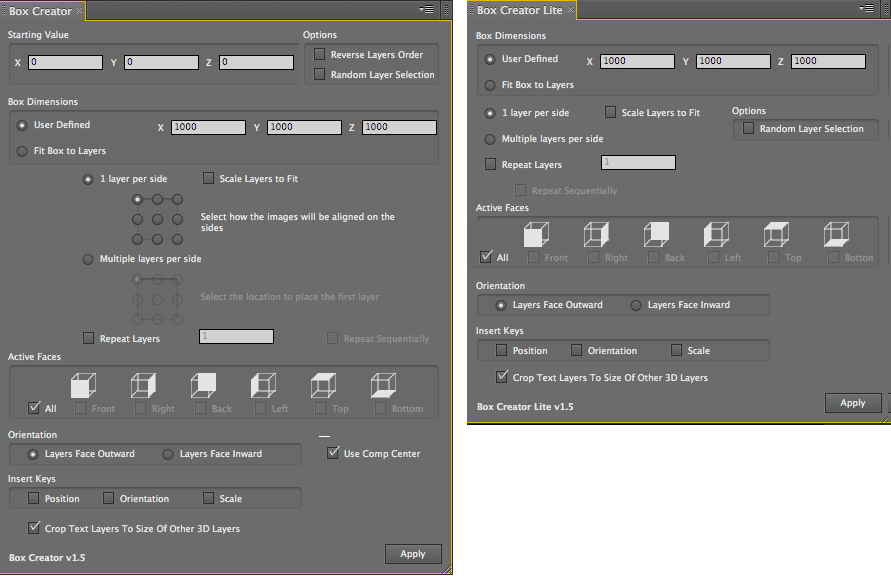
Creator Assistants: Box Creator
Box Creator distributes layers on the surface of a cube. It can be used to create cubes, boxes, tunnels and walls. This tool is different than Cubic Distribution, which distributes layers within a cube.
How it Works: Select the 3D layers in your composition that you wish to distribute on the surface of a cube, and go to Window> Box Creator or Lite.

How layers work in Box Creator
Be aware of your layer sizes when using Box Creator. A perfect cube can only be created when all the layers are squares and are the same size. This is a pretty important concept. If your layers are not square or the same size, you will see gaps where the edges don’t meet perfectly and the layers are not aligned. If you run into problems, try using layers with the same dimensions.
Also, make sure you have enough layers to build with . A cube requires 6 layers, while a box-shaped tunnel may require 60. A little pre-planning and thinking about the number of layers and the size of the layers will go a long way to getting what you want. You can use the Repeat Layers option, but one way or the other, you need to get the right amount of layers.
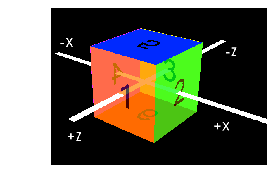
It is also important to understand layer order for Box Creator. It will first place a layer on the front side, then go counter clockwise from there. The right side gets the second layer, the back side gets the third, the left side gets the fourth layer, and the top and bottom get layers 5 and 6. The chart below at right shows the layer order.

At left, a box with the layers scaled to be a perfect square. Square layers are required even for a seamless, perfect cube.
In middle, a box using non-square layers. If all the layers are the same width in one dimension you will get a box with gaps.
At right, a box whose dimensions are larger than its layers results in gaps between all layers.
Far right, the layer order that Box Creator follows by default.
Creating the perfect cube
As you might guess, creating a perfect cube requires 6 square layers that are all the same size. Since there aren’t many cameras that capture video in a square, this presents a problem. You can either squish the normal video or mask out a square portion of the video. Since much footage is captured with the screen safe limits of TV in mind, it’s often not difficult to cut a square chunk out without losing much.
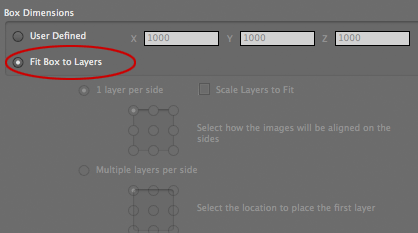
PlaneSpace doesn’t recognize masks on layers. The Assistants still see the layer at its full size. The way around this is to drop each layer into its own square pre-comp. If you have a bunch of square pre-comps, all you need to do in the Box Creator is click Box Dimensions> Fit Box To Layers (see below) and click Apply. This will make a perfect cube.
Starting Value
Sets the center of the cube that you are creating.
See Creator Assistants, Common Parameters
Box Dimensions group
Represents the dimensions of the cube shape (or box) that will hold the layer distribution. There are four options:
Box Dimensions> Fit Box to Layers
This option will automatically size the box based on the dimensions of the selected layers. It is most effective when used to create a simple 3D cube or box using square layers.
When using Fit Box to Layers, it is best to select the same number of layers as there are active faces on your cube. For instance, if you want to create a cube, you will select 6 layers, one for each face. If you want to create a box with no top or bottom, you will select 4 layers.
If the layers are not square, Box Creator will make the best attempt to arrange them without the gaps being too large. However, any non-square layers will result in gaps and this is unavoidable. Make sure your layers have similar dimensions.
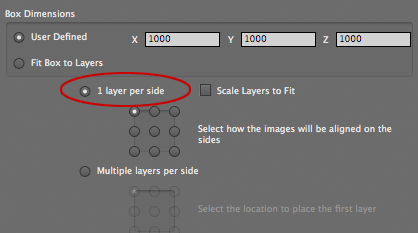
Box Dimensions> User Defined, 1 Layer Per Side
This option will limit the box to one layer per active face. If there are extra layers selected, they will be ignored by Box Creator.
With 1 Layer Per Side, you can select where on the sides of the cube each layer will be aligned. Each layer will be placed at that spot on their respective sides of the cube. If the upper right button is selected, all layers will be placed in the upper right corner. If the center button is selected, all layers will be placed in the center of the cube side, and so on.
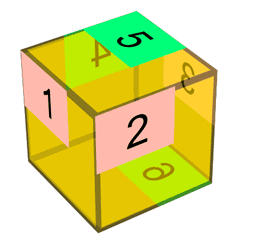
In this example, the '1' shows the upper left button is selected.
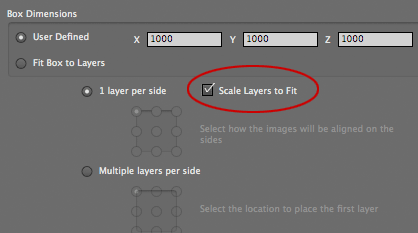
Box Dimensions> User Defined, Scale Layers to Fit
This option will automatically scale the selected layers so they match the dimensions of the cube. This is extremely useful if you are trying to make a perfect box. Scale Layers to Fit will scale the layers up to the required size. Use this option to make boxes out of layers whose sizes differ or whose dimensions don’t match the desired box size. It also works great for creating cubes out of Solid layers. Just create a Solid of any dimension, repeat it 5 times and scale it to fit. Instant color box!
A possible issue is that when layers are scaled, they may look distorted or pixilated. It helps to prepare your files in advance, although when layers are only scaled slightly this option works fine.
Box Dimensions> User Defined, Multiple Layers Per Side
This option will allow multiple layers to be distributed on each face of the cube. You can place as many layers as will fit on the cube faces.
As with 1 Layer Per Side, you can select where on the sides of the cube the layers will be placed. Starting Value is particularly important when you are placing multiple layers on each side.
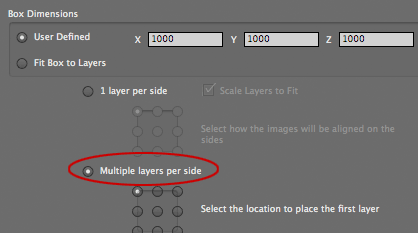
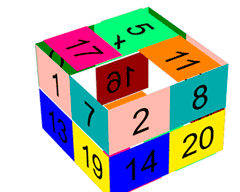
In this example, the box has four layers per side, with the '1' showing that the upper left corner is selected.
Active Faces buttons
Decides which faces of the cube will be used for layer distribution. This gives you some very cool flexibility to create tunnels or arrange layers to form room sectionals.

A room ‘half-section’, which is a box without the Top, Front and Right sides.
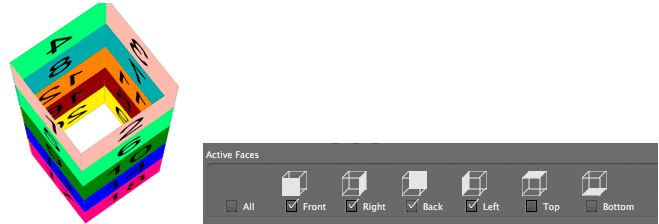
A tunnel with Top and Bottom sides turned off.
Orientation buttons
Decides which direction the layers should orient themselves: Inward or Outward.
See Creator Assistants, Common Parameters
Insert Keys group
Three checkboxes that specify which layer properties will have a keyframe set for them: Position, Rotation and/or Scale.
See Creator Assistants, Common Parameters
Repeat Layers checkbox
Options> Reverse Layers Order
Options> Random Layer Selection
Use Comp Center checkbox
Crop Text Layers to Size of Other 3D Layers checkbox
See Creator Assistants, Common Parameters