Lens group
Once you've created a flare effect using the Lens Designer, the Lens group affects the look of the lens flare. You can adjust Lens properties for brightness, scale, color and rotation angle. If you are using After Effects, Knoll Light Factory also works with 3D depth.
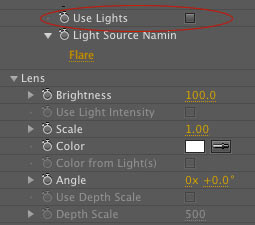
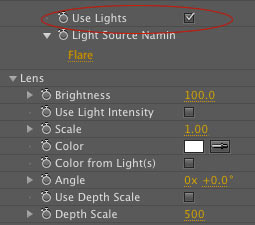
Certain controls in the Lens group are supported in After Effects only. When you turn on the Location group's Use Lights checkbox, you enable the Light Intensity, Color and Depth Scale checkboxes. These checkboxes let your Knoll light share the properties that are set for After Effects Lights.


At left, Location> Use Lights is turned off. At right, Use Lights is turned on, which activates four Lens controls.
Brightness
The Brightness slider controls the brightness of the lens flare. Brightness causes the center of the flare to increase in size as it blooms or pushes towards white.
The slider range is 0 to 300. The default is 100. A Brightness value of 0 is handled as a special case and does not render. You can use this feature to turn the flare on and off during an animation.
Use Light Intensity checkbox (After Effects only)
Turn on this checkbox to apply the Intensity property of the After Effects Light to the Knoll light. Use Light Intensity overrides the Lens> Brightness setting. Turned off by default.
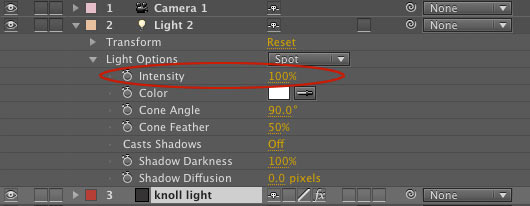
The Light Intensity property in the After Effects Timeline.
Scale
The Scale slider adjusts the scale of the lens effect. Scale will change the overall size of the flare elements. It does not brighten the flare or change its position. You can animate Scale to simulate the adjustment of the focal length of a zoom lens.
The slider range is 0 to 5. The default is 1. High values increase the size of the flare elements.
Color
Color specifies the color for the light source. To simulate a blue light, for instance, set the color to blue. The Color well lets you pick a lens color from a palette, while the Color eyedropper samples a color from anywhere on your screen.
This color affects hue and saturation values. A bright blue and dark blue color will give the same results. Neutral colors like dark gray or black will not darken the flare.
As you increase the color's saturation, the color will override the individual colors in the flare effect. Therefore, you can use Color to override the individual colors of the Elements and Sprites in the flare effect.
Color from Light(s) checkbox (After Effects only)
Turn on this checkbox to apply the Color property of an After Effects light to your Knoll light. Turned off by default. When active, Color from Light(s) overrides the Lens> Color setting.
This feature works with multiple lights. If different AE lights in the Timeline have different color properties, those individual colors are respected, and your Knoll flares will have a variety of colors.
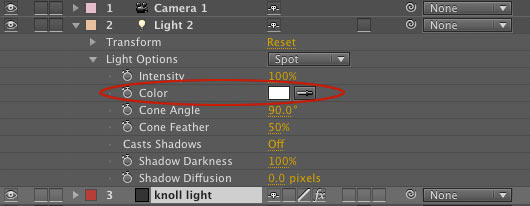
The Color property in the After Effects Timeline.
Example workflow for using AE lights
Here's an example workflow using Color from Light(s):
1) Open After Effects, create a new comp, create a new layer, and apply Knoll Light Factory to that layer.
2) In After Effects, add a light and name it 'Light 1'. Keep the default white color for the light.
3) In After Effects, add a second light and name it 'Light 1' also. Change the default color to green. You now have two lights named 'Light 1'.
4) In Knoll Light Factory, go to Location> Light Source Naming and change the name to 'Light 1' and check the Use Lights checkbox.
6)
If you haven't already, move one of the After Effects lights so they aren't overlapping.
7) In Knoll Light Factory, go to Lens> Color and check the Color from Light(s) checkbox.
Results: The Knoll lights take on the colors of the After Effects lights. One Knoll flare will remain the same color since it was kept the default white. One of the lights will be green since you selected 'green'. You can use numerous lights with all different colors and if you check "Color from Light(s)", your flares will match those colors.
Angle
Angle is used to create a shimmer when you animate certain elements. These elements include Random Fan, Photon Spikeball, PolySpikeBall and Sparkle.
To create this shimmering effect, you can enter different keyframe values for Angle at the beginning and end of the flare’s appearance in your project's Timeline. The flare element will change or rotate about the Light Source Location point. Some of the individual elements, like the Star element, will rotate in place as this value changes. Angle will rotate based on the location of the lens flare even if it's altered by other parameters like Location Layer.
NOTE: Many controls in the Lens group are related to controls in the Lens Designer. However, this Angle control is NOT related to the Angle control in the Lens Designer. It is also not related to the Cone Angle control in the Light Properties for After Effects.
Use Depth Scale checkbox (After Effects only)
Turn on this checkbox to activate the Depth Scale slider, which is explained below. Turned off by default.
By default, when the Lens> Use Lights checkbox is turned on, Knoll Light Factory will use the X, Y and Z coordinates of your After Effects light to determine the location of the lens flare. As you move your light around, the size of the lens flare will not change as it moves in Z space. If you would like your flare to give more realistic results, turn on Depth Scale to change the size of the flare as it moves in Z space.
Depth Scale (After Effects only)
Depth Scale lets your Knoll flare change its size as it moves in Z space within After Effects. It does this by setting how much the Z location of the AE light affects the size of the Knoll flare. The Knoll flare will look larger when the AE light is closer in Z space. The flare will look smaller when the light is further away.
Lower Depth Scale values reduce the distance needed for the light flare to disappear, so the flare diminishes more quickly as the light moves away.