The Skin Tools
Since the focus of Mojo is creating a look that preserves skin tones, Mojo has four controls to make skin tones look their best.
The Mojo controls and the Skin controls work in concert. The default values of Mojo, Mojo Balance and Mojo Tint should leave the skin tones in an image within the correct range (if they were correct to begin with). If you decide to change the Mojo Balance or Mojo Tint to, for example, make the shadows more green, you will end up making the skin tones slightly green as well. In this case, you may need to lower the skin tone value to make the areas of skin look correct again.
The Skin Color control is meant to help you maintain the correct skin tones so your talent always looks like a person and not like an alien.
Note: the Skin group has a pre-defined mask that means that the controls only work on colors that are close to proper skin tones. It works for skin tones of all ethnic groups.
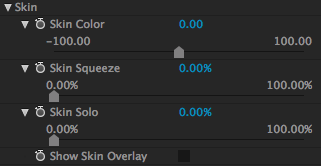
Skin Color
Skin Color is a Hue offset for skin. This control nudges the skin hues a bit. Skin Color may also shift other colors in the footage that are close to a skin tone, including the non-flesh tones, so you need to be mindful of the adjustment.
For all applications: Slider range is -100 to 100.
The default value is 0. Lower values shift the skin hues closer to magenta. Higher values make the skin hues appear more yellow-green.
Skin Color is a great slider to adjust when you have Show Skin Overlay turned on. Skin Color lets you adjust the range of skin colors, while Skin Overlay shows you which areas of color are the correct skin color.
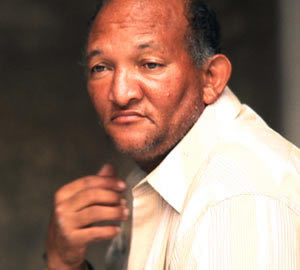
At left, Skin Color at 0. In middle, Skin Color at -10. At right, Skin Color at 60. These are extreme values to show the range of tones that the control will change—neither are really attractive adjustments.
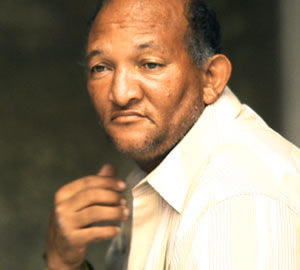

At left, Skin Color is set to 0. In the middle, Skin Color is set to 30. At right, Skin Color is set to 43. These two values could both work. The lower value of 30 is the correct value to adjust the skin tones to read as skin. The higher value of 43 is more yellow and slightly off from the "correct" color.
Skin Squeeze
Often skin tones are too varied in color, and sometimes people's skin can take on a blotchy appearance. Skin Squeeze compresses the skin tones to be more uniform in hue. This compression or 'squeezing' reduces blotchiness and unifies uneven complexions, which has the effect of flattening out skin tones.
For all applications: Slider range is 0 to 100.
The default value is 0%. Higher values force any color that is close to a flesh tone to be a flesh tone, effectively reducing the number of colors. Lower values allow for a greater variation in skin hue.
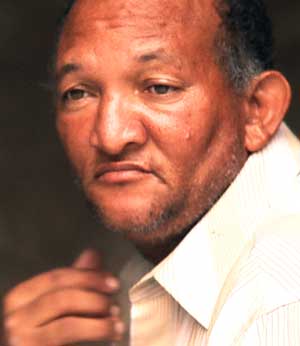
At left, Skin Squeeze at 0. In middle, Skin Squeeze at 60. At right, Skin Squeeze at 90. Notice how the red and magenta tones converge toward a proper flesh color at higher values.
Skin Solo
Making people stand out against the background is a big part of modern movie visuals. Skin Solo reduces the saturation of all colors in the image that aren't skin, which can help simplify your color palette and make the shot less busy. Desaturating any color that isn't skin helps to focus attention on the subject of the shot, making that person 'pop' in the scene.
To achieve a pure-skin-tone look (where skin tones are the only areas saturated with color), the Mojo slider must be set to 0, since the Mojo controls are applied after the skin group controls.
For all applications: Slider range is 0 to 100.
The default value is 0%. At 100%, the image becomes black and white except for the skin tones. In the mid-range values, some non-skin colors are mixed in to show a partially desaturated image.


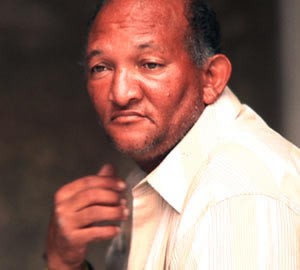
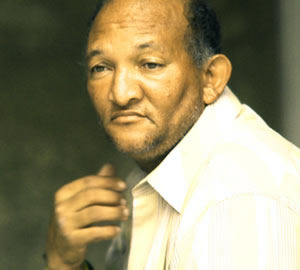
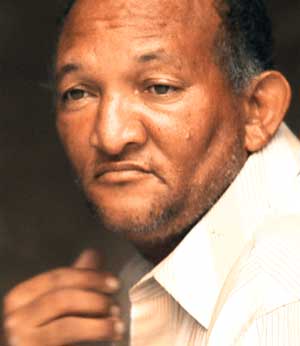
Here the Mojo control is set to 0. At left, Skin Solo is set to 0: note that the shirt is a noticeable shade of dark blue. In middle, Skin Solo is set to 50, and the shirt has lost some saturation while the skin tones are unchanged. At right, Skin Solo at 100, and the skin tones in the face are the only area with color while the rest of the image is completely shades of gray.
Show Skin Overlay
The Skin Overlay helps you to determine which areas in your image are the correct skin tone. If you turn on the Overlay, an orange grid will indicate where you have true skin tones. This grid helps you set up skin colors that will not only look correct but will align properly to correct skin tones on a vectorscope (a device used to measure color in a video signal). As you change the controls in the skin group, the Overlay grid will shrink or grow covering areas that should be flesh tones.
Wherever the orange lines are drawn, a true skin tone is underneath. If the orange lines increase, that means you have added true skin tone. If the lines decrease, you have removed true skin tone. Skin Overlay is a useful option to activate when dialing in the right value with the Skin Color slider, so you can check skin tones as you work.
NOTE: The Skin Scope preset shows a preview of the color-safe tones with orange grid lines with no other controls on—this is a quick way to check to see if your skin tones are correct. More info is available on the Presets page.
![]()
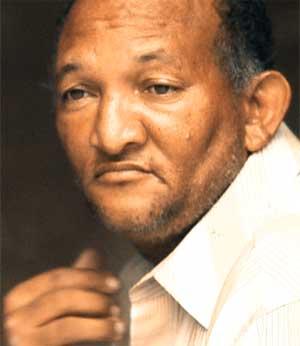
The skin overlay control
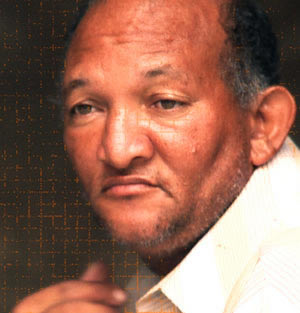

At left, Skin Overlay turned on, with Skin Color set at the default of 0. The Overlay grid covers most of the footage, both non-skin and skin areas.
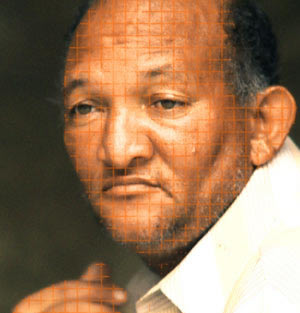
In the middle, Skin Color is set to 30. At this value the grid now covers the only the face and hands and the lines have become filled and distinct. This is the correct value for Skin Color control.
At right, Skin Color is set to 43. With the value above the correct value of 30, the orange gird lines start to fade and become less prominent, indicating that the colors in the face and hands are not precisely skin tones.