The Mojo Controls
The Mojo plug-in creates a pleasing color balance in which people are 'warmed up' while backgrounds are 'cooled off'. Skin tones take on neutral, warm colors, mostly in their highlight areas. In contrast, the shadows gain cool colors. The Mojo effect preserves and even enhances skin tones.
Let's see how this colorization works with the three primary sliders: Mojo, Mojo Tint and Mojo Balance. These controls set the base colorization of the Mojo effect. This page also covers the Blend with Original control.
Note: Blend with Original appears in most host applications but not in Final Cut Studio applications—FX Plug plug-ins already feature an identical control labeled Mix.
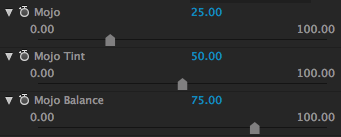
![]()
The Mojo group and Blend With Original control
Mojo
The Mojo effect warms the highlights and cools the shadows in footage. The Mojo slider controls the strength of that effect.
For After Effects/Premiere Pro/Motion: Slider range is 0–100. You can enter values up to to 200.
For Final Cut Pro and Avid: Slider range is 0 to 200.
The default value is 25. High values increase the effect. Extremely high values make the look quite extreme, with a heavy green-blue tint.
If you set Mojo to 0, the Mojo effect is essentially removed. The Mojo Tint and Mojo Balance sliders will be disabled, because these controls are used to temper the effect of the Mojo slider.
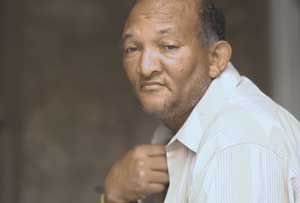
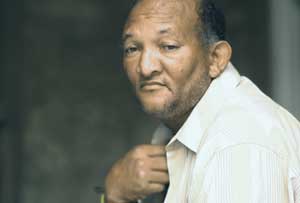

At left, the original image, with Mojo set at 0. In middle, Mojo at 25 (default). At right, Mojo at 80.
Mojo Tint
Mojo Tint sets the hue of the green-blue shadows. It allows colors that range from powder blue to cyan to teal to green. Those cool shadows can range from royal blue to emerald green, although most stylizations opt for the teal hue in between.
For After Effects/Premiere Pro/Motion: Slider range is 0 to 100. You can input values from -100 to 300.
For Final Cut Pro and Avid: Slider range is -100 to 300.
The default value is 50. Lower values generally make bluer shadows, with negative values creating a shade of blue close to purple. Higher values make greener shadows, with values above 100 forcing the shadows toward emerald green.


At left, Mojo Tint at 0. In middle, Mojo Tint at 50 (default). At right, Mojo Tint at 100. Mojo slider at 60 for all three images.
Mojo Balance
Mojo Balance controls the boundary between cool shadows and warm highlights. This slider determines which tones are shadows and which are highlights, which is especially helpful if the shadows are at an extremely high setting. The pivot point can be scaled using the slider to accommodate darker shots.
For After Effects/Premiere Pro/Motion: Slider range is 0 to 100. You can enter values up to 200.
For Final Cut Pro and Avid: Slider range is 0 to 200.
The default value is 75. Lower values bring down the shadow tones and increase more flesh tones, even into the background area. Higher values increase the blue-green tint, and spread it beyond the shadows into the skin tones of the subject.
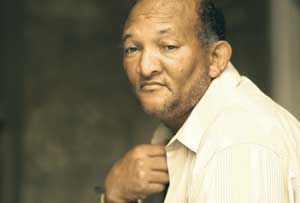


At left, Mojo Balance at 50. In middle, Mojo Balance at 75 (default). At right, Mojo Balance at 100. Mojo slider at 60 for all three images.
Blend with Original
Blend with Original will fade the Mojo results back into the original image.
For all applications: Slider range is 0 to 100.
The default value is 100%, which means the Mojo effect is fully applied. Lower values make more of the underlying image show through. At 0, the Mojo effect is completely hidden and the original footage is fully visible.


At left, Blend with Original at 30. In middle, Blend at 50. At right, Blend at 100 (default).