Example of a Look
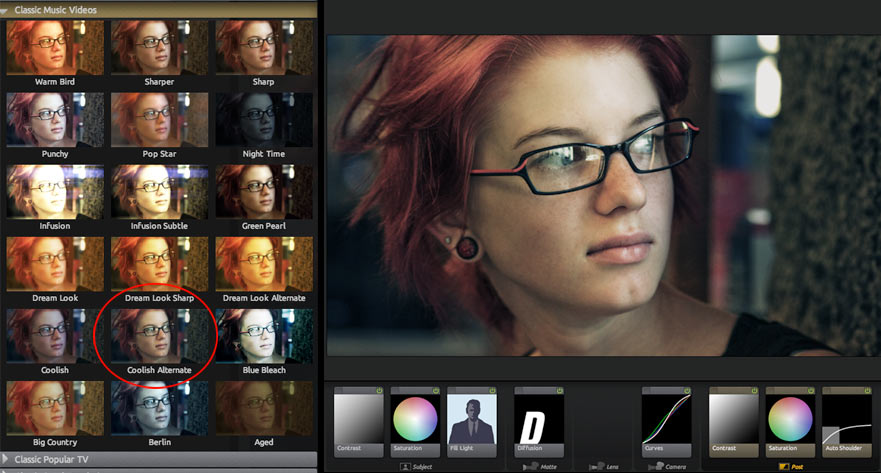
PhotoLooks 2 lets you apply a number of different tools to alter the way the image appears. Your image can be warm and blurred to emphasize a scene that is happy, or cold and dark to make a scene feel distant or lonely. Tools are automatically added to the Tool Chain when a look preset is applied. Each tool's appearance in the Chain shows the effect that it has on the image. Reading the tool states lets you understand how a Look is built from the individual tools.
The following example shows the Coolish Alternate preset from the Classic Music Videos category. We give a tool-by-tool breakdown of this look to help you better understand how to read a look so you can alter it to suit your footage. Coolish Alternate uses eight different tools, including Contrast, Saturation, Fill Light, Diffusion, Curves and Auto Shoulder. The tools are applied in the Tool Chain in a specific order to create the look, with Contrast on the left applied first, and Auto Shoulder on the right being applied last.
Subject Tools
The Subject tools are meant to alter the image before processing. In the case of Coolish Alternate, three tools are used prior to coloring and diffusing the image: Contrast, Saturation and Fill Light.
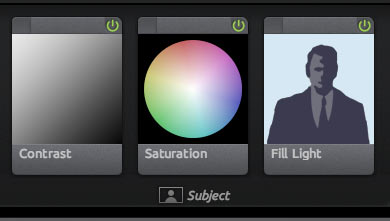 |
Contrast: Set to –0.25 or 25% negative contrast. Rather than enhancing the separation between dark and lights, this tool brings them closer together to allow for more radical changes later. When an image already has a lot of contrast, tools later in the Chain can cause the darks to be crushed or lose detail. By applying this negative contrast up front, this look avoids this problem. Saturation: Used to remove a little saturation from the image. This allows for broader color changes in curves and removes a bit of the common oversaturation of colors in DV or HDV media shot on consumer or prosumer devices. Fill Light: Used to lighten the shadows by more than half. This protects against the big contrast change in Curves. This is also used to color the shadows a deep blue. Often directors or directors of photography will try to push the shadows to blue make the scene appear cold without touching the flesh tones in the image. Fill Light in this instance is a great way to achieve this effect. The Fill Light icon has turned the silhouette more blue to show the effect. |
Matte Tools
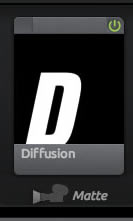 |
The only Matte tool in this example is Diffusion. Diffusion: Set to a size of 1% and a grade of 2. These values make for a softening in the highlights without changing the brightness in the image. This setting tends to hide noise and soften the highlights in image, which can make actors and actresses look smoother. This setting isn't strong enough to lose significant detail, so again this is a great look for media shot on DV/HDV cameras. Notice also how the icon is actually fairly sharp, indicating that this specific setting doesn't cause a lot of bloom or glow in the image. |
Camera Tools
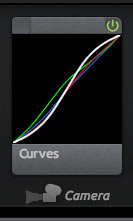 |
The only Camera tool in this example is Curves. Curves: Set to generate strong contrast, with the shadows set to map to a low value, and the highlights to roll off at the top with greater brightness. Also, the green line indicates that the green shadow and midtone values are mapped higher than normal. This counteracts the blue push in the shadows so that flesh tones don't appear too blue and unnatural. |
Post Tools
The Post tools are the final development stage for your look treatment and offer a wide variety of operations that typically happen post-shoot.
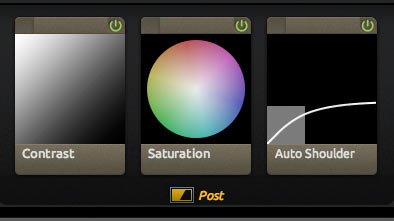 |
Contrast: Set to add a bit of contrast in the highlights with a value of +.23 or 23% more contrast and a Pivot value of .91. These combine to cause the contrast to stretch the midtones and highlight values. Saturation: Set to 93%. This value creates a little less saturation in the scene. Also, exposure compensation is used in this tool to bring the overall range back to close to the original. Auto Shoulder: Set to catch any overbrights and push them back into the 0-1.0 range, in case this look is applied to an image that is very bright to begin with. Auto Shoulder is a great way to make sure that when you output a Look in your editor, you don't have any out-of-range values that would cause bleed on a master tape or clamp to pure white. |