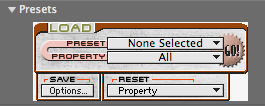
Presets group
In the Presets box, there are presets and properties. 'Presets' are Psunami scenes that have already been created and are available for you to load in as new scenes. 'Properties' are the individual Psunami parameters that have been adjusted to construct these scenes.
When you load in a preset, you load in all of the affiliated properties. This gets you quickly started with using Psunami. Presets are organized into descriptive categories like Underwater scenes and Night scenes. Properties are also organized into logical categories like Render Options and Air Optics.
Note: The Preset group is not available in Final Cut Pro or Motion.

Presets group.
What presets & properties do
The Presets section is divided into three panes: Load, Save and Reset. You use the controls in the Load pane to load and apply presets, and to choose whether to apply all the properties in the preset, or to apply selected groups of properties.
You can do the following:
• Open and apply presets or collections of property settings.
• Choose which properties will be affected when you apply a preset.
• Organize your presets into categories.
• Save, rename, and delete presets and categories.
• Reset selected groups of properties to the default settings.
Working with presets
Psunami ships with a number of premade compositions that you can use as starting points for your own experimentation. These projects are called Presets.
Choose a preset
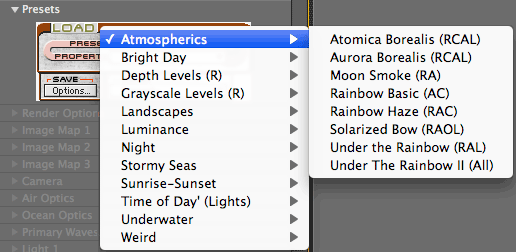
To choose a preset, click on the Preset popup menu. You'll see a list of preset categories with side arrows. Click a category to open the submenu, then select a preset. Important: Your preset will not be applied until you click the Go! button.
The acronym at the end of each preset name refers to the parameter group that it affects. For instance, the Atmospherics> Atomica Borealis preset will affect settings in RCAL, meaning the Render Options group, Camera group, Air Optics group and Lights group.

Apply the default scene
When you first apply Psunami to a layer, the default Property settings are used. In the default scene, the camera is positioned at an elevation of 10 meters over the ocean surface, facing east toward the sun, and angled down toward the water slightly.
As with all plug-ins, you can return to these default settings at any time by clicking the Reset button. This is located next to the plug-in's name in the Effect Controls window.
Where presets live
When you install Psunami, the plug-in creates a folder called Psunami at this location: Mac HD/Users/Shared. In that folder are subfolders of Preset categories containing the Preset files. Your own presets and categories will be saved here as well. Be careful not to move or rename these folders, or you may not be able to load your presets.
Working with properties
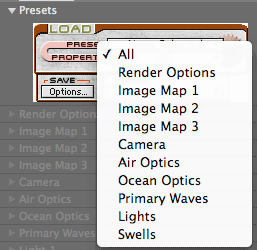
Once you've chosen a preset, you can decide how many of its properties to actually use. Open each property group with the adjacent arrow to access the category's properties. You can collapse each group to free up screen space and reduce clutter.

Reset properties to their defaults
The Presets control panel also lets you selectively reset Psunami property groups to their default settings.
Once you've loaded a complete preset or one or more property groups from a preset, you may find it necessary to reset one or more of the altered property groups. This will definitely happen if you're just trying out Presets and don't like the results of a selected preset property group you've just loaded.
In your host application, you can always use the standard Reset button found in all Effect Control windows. Unfortunately, this resets all effect properties to their default settings, which will wipe out other property group settings you may want to keep. The Reset pane lets you select individual property groups to reset.
To reset a property group, select it from the Property popup menu in the Reset pane. All the properties in the property group will immediately be reset to their default values. Resetting a Property Group is undo-able.
The Preset Manager
Once you've created your own Psunami settings, you can use the Preset Manager to save and organize custom presets for later use.
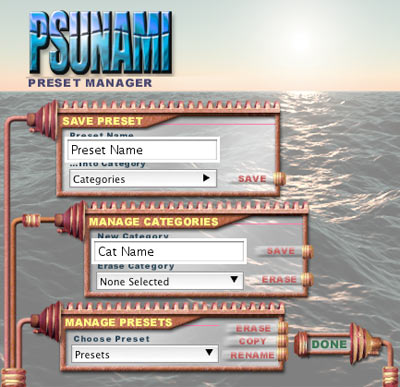
The Save pane in the Presets control panel lets you open the Preset Manager. In this control panel, you can save, copy, rename and delete your own Presets, as well as create, save and delete your own categories. You can also use the Preset Manager to rename and delete the default installed presets and categories, if you wish.

Save> Options... button
To open the Preset Manager, click on the Options... button in the Save pane of the Presets section. To exit the Preset Manager and return to the main Psunami controls, click Done. You will notice three panes in the Preset Manager window: Save Preset, Manage Categories and Manage Presets.