Interference Ghost Settings group
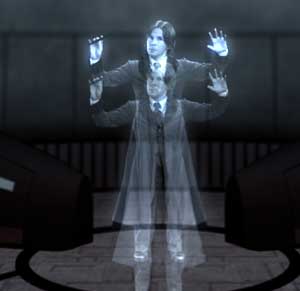
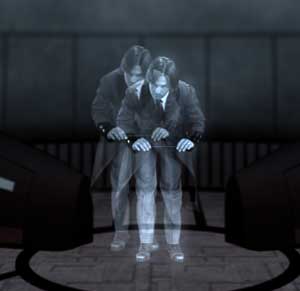
Interference Ghost creates a doubling of the holographic image. This creates a 'ghosting' that shows the current frame of video in an offset and overlaid version.
This group corresponds to two checkboxes. One is Use Interference Ghost, which activates the entire parameter group. The other checkbox is Use Distortion, which activates the group's Advanced> Distortion parameters. The Use Distortion checkbox distorts that ghosted image by making it a little wavy. Let's read about both sets of controls on this page.
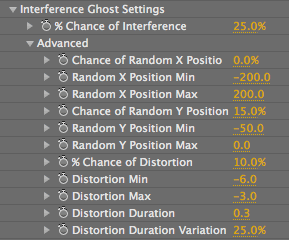
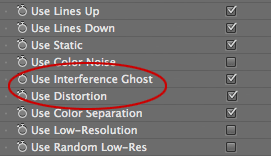
At left, the Interference Ghost and Distortion settings. At right, the two related checkboxes.


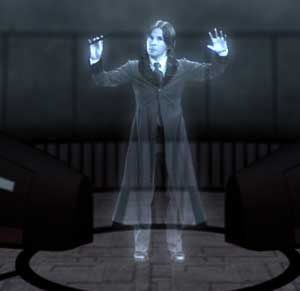
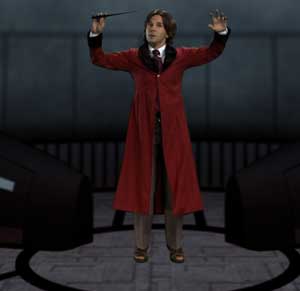
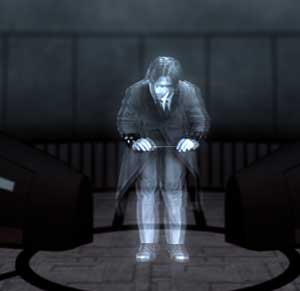
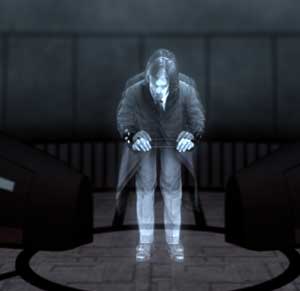
At left, with Interference Ghost. In middle, without Interference Ghost. At right, without Holomatrix. Original footage courtesy of www.allbetsareoff.com
% Chance of Interference
In this group, the main parameter is % Chance of Interference. This controls determines how likely we are to see the interference ghost at any given frame. Default setting is 25%. Value range is 0 to 100, and measured in percentage. Higher values mean the ghosting is more likely to happen.
Advanced Parameters: How Random Positioning Works
The Interference Ghost group has a group of Random Position parameters. Let's talk a little about how they work.
Chance of Random X and Y affect how likely the interference ghost is going to happen. The parameters do this by setting a random value to the likeliness. Random X and Y Min and Max determine how far, measured in pixels, the ghosting can occur from the source image.
For instance, if the Random X Max value is 100, then the ghost can’t be more than 100 pixels away from the source image horizontally. If theRandom X Max value is 1,000, then the ghost can’t be more than 1,000 pixels away from the source image horizontally. With X Min/Max at 100/1,000, the ghosting is a value that is randomly chosen between 100 and 1,000 pixels distance from the source.
Now let's look at the details of the Position controls.
Chance of Random X Position
Determines how likely the ghost will be offset on the X axis. Default setting is 0%. Value range is 0 to 100 and measured in percentage. Higher values mean the X axis ghosting is more likely to happen.
If Random X Position is at 0, then Random X Min and Random X Max will have no effect on the ghosting. The ghost will not have horizontal movement.
Random X Position Min
Determines the minimum possible offset value, in pixels, for the Random X Position. Random X Min moves the ghost along the X axis, to the left and right of the source image.
Default setting is -200. Value range is -2,000 to 2,000. Higher values move the ghost to the right. Lower values move the ghost to the left.
Random X Position Max
Determines the maximum possible offset value, in pixels, for the Random X Position. Random X Max moves the ghost along the X axis, to the left and right of the source image.
Default setting is 200. Value range is -2,000 to 2,000. Higher values move the ghost to the right. Lower values move the ghost to the left.
The Random X parameters let the ghost move hoirzontally.
Chance of Random Y Position
Determines how likely the Interference Ghost will be offset on the Y axis. Default setting is 15%. Value range is 0 to 100 and measured in percentage. Higher values mean the Y axis ghosting is more likely to happen.
If Random Y Position is at 0, then Random Y Min and Random Y Max will have no effect on the ghosting. The ghost will not have vertical movement.
Random Y Position Min
Determines the minimum possible offset value, in pixels, for the Random Y Position. Random Y Min moves the ghost along the Y axis, up and down from the source image.
Default setting is -200. Value range is -2,000 to 2,000. Higher/positive values move the ghost downwards. Lower/negative values move the ghost upwards.
Random Y Position Max
Determines the maximum possible offset value, in pixels, for the Random Y Position. Random Y Max moves the ghost along the Y axis, up and down from the source image.
Default setting is 200. Value range is -2,000 to 2,000. Higher/positive values move the ghost downwards. Lower/negative values move the ghost upwards.
Set value to 0: Random Y Max is an important parameter because it can save your project from looking fake. (Since we all know holograms are real!) If Random Y Max is set to 0, then the ghosted image can't go lower then the bottom of the source image. This keeps the hologram image from appearing to move lower than the floor line.
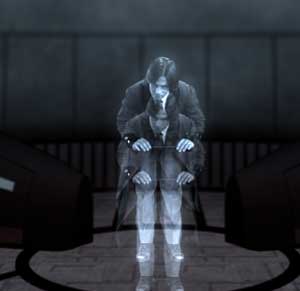
Random Y parameters let the ghosting move vertically. At left, Random Y Max at 0 keeps the ghost at/above the floor line. At right, Random Y Max at 200 lets the ghost go below the floorline.
Advanced Parameters: How Distortion Works
The Interference Ghost group also has a group of Distortion parameters. (This is a very busy group.) Let's talk a little about how they work.
The Distortion parameters give the interference ghost a chance of being distorted by making the ghost look wavy. Distortion is activated by the Use Distortion checkbox. Of course, Use Interference Ghost also needs to be checkmarked, since Distortion is distorting the ghost rather than the source image.
Let's look at how Distortion works.
% Chance of Distortion
Determines how likely we are to see the distortion at any given frame. Default setting is 10%. Value range is 0 to 100, and measured in percentage. Higher values create a greater likeliness of distortion.
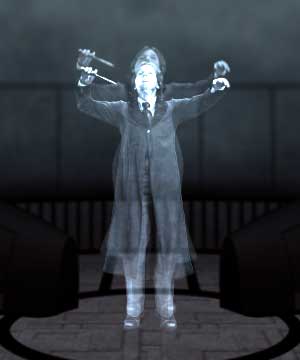
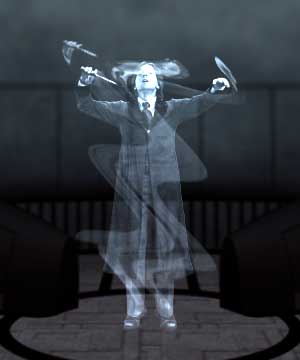
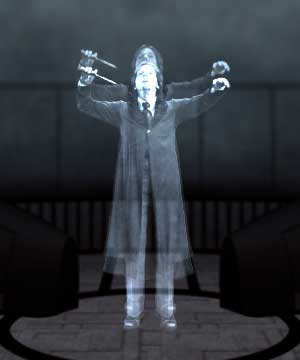
At left, Interference Ghost with Distortion. In middle, with a lot of Distortion. At right, no Distortion.
Distortion Min
Determines the minimum waviness of the ghosted distortion. Default setting is -6. Value range is -100 to 100. Positive values make the distortion move in one direction. Negative values move the distortion in the opposite direction. At 0, there is no visible distortion. At -100 and 100, there is the highest possible distortion.
Distortion Max
Determines the maximum waviness of the ghosted distortion. Default setting is -3. Value range is -100 to 100. Positive values make the distortion move in one direction. Negative values move the distortion in the opposite direction. At 0, there is no visible distortion. At -100 and 100, there is the highest possible distortion.
How Min and Max work together
Distortion Min and Distortion Max work together by setting the potential amount of distortion. The higher each of these values, the more likely there will be a waviness, and the more distorted that waviness will be.
For example, if Distortion is set to Min -5 and Max 5, then there is a small range of distortion and the possibility that Distortion will hit 0, meaning no visible distortion. If Min is -50 and Max is 50, then the range of distortion possibilites is greater.
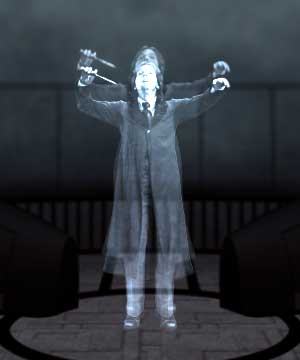
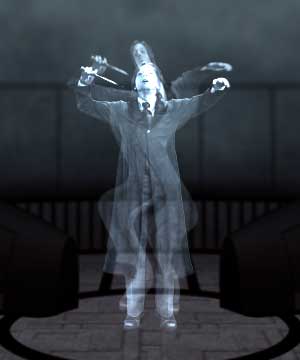
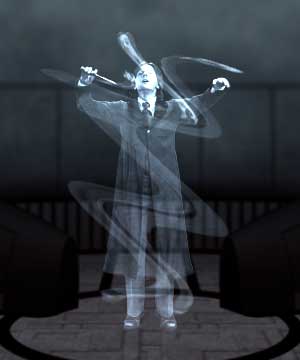
At left, Min at -5, Max at 5. In middle, Min at -50, Max at 50. At right, Min at 50, Max at 50.
Distortion Duration
Determines how long a given distortion will take place. Default setting is 0.3 (which is 30% of 1 second). Value range is 0 to 5, measured in seconds. Higher values mean the amount of time is longer.
Distortion Duration Variation
Determines how much the length of time for a given distortion can vary from the Distortion Duration value. Default setting is 25%. Value range is 0 to 100, and measured in percentage.
At 0% Variation, there is no variation. Higher values mean the variation will be greater. At 100% Variation, the Distortion Duration can as much as double the set amount of time. It can also show no distortion, as the range to set Distortion Duration is now between 0-100%.