
Working with Holomatrix
Holomatrix gets started a bit differently than most plug-ins. This is because the software is actually a bunch of things all wrapped together: plug-in, scripts and expressions working together under one hood. This page explains how you can apply, nest, pre-comp, and remove (though why would you want to?) Holomatrix.
The installer installs several components, including scripts, presets, and two plug-ins: Holomatrix and Knoll Unmult.
How to Activate Holomatrix
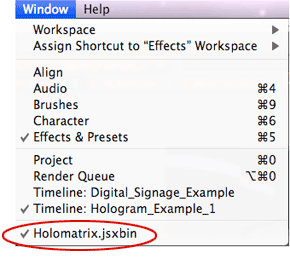
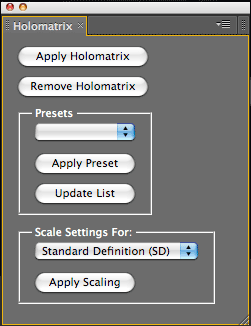
Holomatrix is not accessed through the Effects menu. Instead, to activate Holomatirix, choose Window > Holomatrix. This will bring up a custom palette with five buttons and two pull-down menus. This palette can be moved and docked like any other After Effects palette.
The Holomatrix interface items are:

![]()

At left, choose Holomatrix from the Windows menu. At right, this brings up a custom palette.
To Apply Holomatrix to a Layer
Select your layer and then choose Add Holomatrix.
Once Holomatrix has been applied, you will see that your original layer has been pre-composed and a new nested comp sits at the top layer, with controls for Holomatrix. Several After Effects expressions have been added in the pre-comps.
OpenGL Warning
Based on the version of After Effects you’re using, you may get a warning that After Effects' OpenGL needs to be disabled. If you get this warning, you should choose to allow Holomatrix to disable openGL. Otherwise, After Effects may crash while using Holomatrix. The good news is that if you do disable OpenGL, you will probably not see any difference in the way After Effects behaves. The vast majority of users never utilize OpenGL.
The OpenGL feature is easy to turn back on. Holomatrix will walk you through that process, but just so you know, here's where you can find the function.
How to Remove Holomatrix
Because Holomatrix is a new breed of plug-in, if you try to delete it the normal way, by selecting the item in the Effect Controls palette and hitting the delete button, the Holomatrix will not delete properly. To avoid a bunch of error messages, we've set up a warning message that tells you to delete Holomatrix by clicking the Remove Holomatrix button in its custom palette.
To remove Holomatrix, go into the Holomatrix palette and, with your layer selected, choose the Remove Holomatrix button. NOTE: Do not try to remove Holomarix by deleting the layer or the effect! Always use the Remove Holomatrix button.
Nesting & Naming in Holomatrix
Holomatrix needs to be pre-composed in a particular way. The plug-in also is sensitive to its layer being renamed once the effect is applied. Please see our Technical Notes about naming and nesting Holomatrix layers on this Known Issues page.
Custom Folder in Project Window
When you apply Holomatrix, a new folder will be created in the Project Window. This folder will have the same name as the footage to which you applied Holomatrix, except that it will have the suffix “_Holo Pre-Comps.” For example, if your footage was named “My Video,” then the folder would be called “My Video_Holo Pre-Comps.”
This folder contains all of the pre-comps created by Holomatrix for use in the Holomatrix effect. Each of the pre-comps in that folder is named in the order of progression, with a descriptive suffix. For example, if your footage was named “My Video,” then it would be broken down as follows:
You can go into these comps and make changes to the layers directly, although if you are not comfortable with expressions, you may not want to.