Using the Sprite Controls
Sprites are bitmap shapes that are used as building blocks in Knoll Light Factory 3. You can see the full list of Sprites on this page.
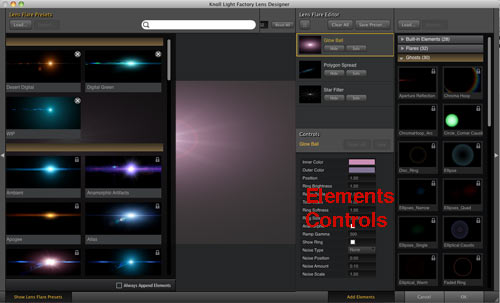
In the Lens Designer, the Element Controls panel displays the full list of Sprite controls. These controls are the same for every Sprite. You can access the Elements Panel by clicking the Open/Close button, located along the right side. The keyboard shortcut for opening/closing the panel is 'E'.
When a Sprite is added to the flare effect, a list of related settings appear in the Element Controls. These controls let you adjust its appearance and are reflected in the Preview Window. The Sprite Controls will update as you select an Element in the list. If you do not select a Sprite, this area will be blank.

![]()
Tint Amount
Removes the color of the imported image. A setting of 0% keeps the full original color. A setting of 100% fully desaturates the image color.
Position
The Position of the sprite is always along a line that passes through both the center of the image and the light source. A value of 1 places the sprite at the light source. A value of 0 places the sprite in the center of frame. A value of -1 places the sprite on the opposite side of the frame from the light source.
Brightness
Sets the brightness of the Sprite. High values make the element brighter. Low values make the element less bright and more transparent.
NOTE: Scale and Brightness combine to set the overall strength of the effect. Low settings will fade out the effect quickly. High settings will add sharp white streaks of light.
Scale X, Scale Y
Sets the size of the Sprite in either X space (horizontally) or Y space (vertically). High values make the element larger. Scale can be stretched to the point where your sprite is distorted. The X and Y values aren't locked together, so be careful of distorting the Sprite, unless that's your desired result.
NOTE: Scale and Brightness combine to set the overall strength of the effect. Low settings will fade out the effect quickly. High settings will add sharp white streaks of light.
Maintain Aspect Ratio checkbox
Locks the Scale X and Scale Y controls together so their aspect ratio is preserved as you change the size of your Image Sprite. If you'd like to stretch out the Sprite, uncheck this box.
Position Tracking pop-up
Sets how the Sprite moves along the X and Y axis when the Position control is adjusted.
![]()
Offset X, Offset Y
Offsets the position of the Sprite on the X and Y axes. For Offset X, positive values move the Sprite to the right side of the screen, while negative values move it to the left. For Offset Y, positive values move the Sprite to the bottom of the screen, while negative values move it to the top.
Blur Amount
Applies a blur to the Sprite. Set to 0 by default, which means no blur is applied. The value determines how much of that blur is applied, measured in percentage. The higher the value, the more heavily the blur will be applied.
Rotation
Applies a rotation to the Sprite. Set to 0 by default, which means no rotation is applied. The value is the angle of rotation that gets set. For instance, a Rotation of 35 sets the Sprite at a 35 degree angle.
Sprite Image pop-up
Use the Load button to add your own image as the Sprite source. A pop-up window lets you choose any bitmap file, like JPG or PNG. You can manipulate the new image using the same parameters available for pre-built Sprites.
![]()
Center Fade checkbox, Center Fade Rate
This checkbox and slider control how the Sprite will behave as it reaches the center or edges of a comp. The Center Fade checkbox activates Center Fade Rate.
At a value of 1, the Sprite will be at full opacity along the edges of your comp, but fades as it reaches the center of your comp. At a value of 50, the Sprite is at full opacity at all locations in your comp. At a value of 100, the Sprite is at full opacity at the comp center, but fades as it reaches the comp edges.
Align to Source checkbox
By default, Knoll Light Factory aligns a Sprite to the center of the flare. This means your Sprite will automatically rotate so its X axis is in line with the centerpoint of the flare. If you uncheck Align to Source, the Sprite is imported without any rotation applied.