Using the Element Controls
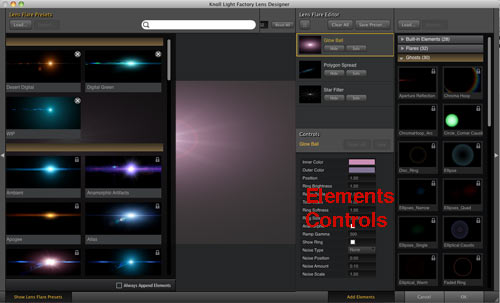
The Elements Controls panel displays the individual controls that accompany each Element, Sprite and Element Preset. Read the full list of Elements on this page.
In the Lens Designer, the Elements panel displays the gallery of Elements. You access the Elements panel by clicking the triangular Open/Close button, located along the right side. The keyboard shortcut for opening/closing the Elements panel is 'E'.

Variety in the Controls
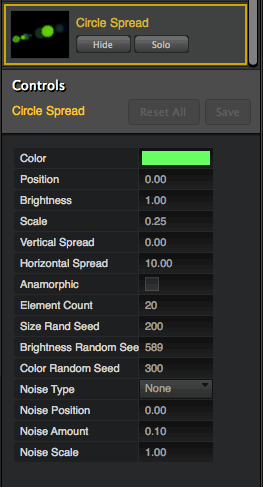
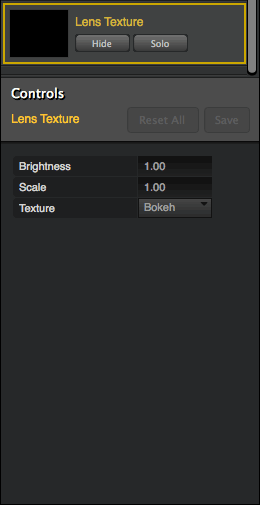
The Elements Controls will update as you select an Element in the Elements Panel. Each element has a different set of controls, so the control options will change as you highlight different Element types. If you do not select an Element, this area will be blank.
As you drag the sliders, the Preview Window will update in close to real time. The value changes made to each Element will be reflected in the Preview Window.
![]()
By default, Knoll Light Factory aligns an Image Sprite to the center of the flare. This means your Element will automatically rotate so its X-axis is in line with center point of the flare. If you uncheck Align to Source, the Image Sprite is imported without any rotation applied.
Used by: Image Sprite
Use this to create a wide elliptical element or a circular elliptical element. Turned off by default.
When the checkbox is checkmarked, the Chroma Fan is elliptical. This simulates a common aspect of using anamorphic lenses in cinematography in which light reflections in the lens appear elliptical. When the checkbox is off, the element is round, since light reflections appear round in spherical cinematography.
When should you use this? The wide circular anamorphic flares only happen with anamorphic lenses, and anamorphic lenses are used to shoot wide-screen motion pictures. Super35 and 16mm motion pictures, and film shot with television and video cameras use ‘flat’ lenses. It is not technically correct to use an anamorphic flare in a Super35 film or a television show. Similarly, the blue horizontal stripe seen in many anamorphic flares is an artifact of the way anamorphic lenses are built, so you won’t see them in film shot with flat lenses.
Used by: Glow Ball, Spike Ball, Star Filter, Star Filter (new), Circle Spread, Elliptical Caustic, Star Caustic, Fading Ring, Poly Spike, Chroma Hoop, Single Poly, Disk, Ellipse, Sparkle, Chroma Fan, Tilted Ellipses
Sets the angle of the element by rotating it. High values rotate to the right. Low values rotate to the left.
Used by: Spike Ball, Star Filter, Star Filter (new), Polygon Spread, Element Strip, Random Fan, Poly Spike, Single Poly, Stripe
This control is based on the real-life role of the aperture in a camera. Aperture is the physical opening of the diaphragm inside a photographic lens. Like the iris of an eye, Aperture controls the effective diameter of the lens opening. This diameter controls how much light comes through to the film or image sensor, and helps to regulate the degree of exposure to light.
Aperture affects the overall diameter of the Aperture Reflection element. We suggest that you stay in mid-range values for Aperture Offset. Values that are too high or too low cancel out its effect.
Used by: Aperture Reflection
Sets the size of the Chroma Hoop. The word 'apogee' refers to an orbit around the earth. When you increase Apogee Scale, you are increasing the orbit of the Hoop.
Low values make the Hoop smaller. High values make the Hoop larger.
Note that the Position control sets the baseline for the Hoop sizing. Apogee Scale will only scale down to that baseline. If you want a smaller hoop, you need to set Position closer to the light source.
Used by: Chroma Hoop
Arc Completeness sets how much of the Hoop's circle is filled with its effect. The effect of Arc varies depending on what Apogee Scale (see above) is set to. To get the most of Arc, you should experiment with different Position and Apogee Scale values.
At low Apogee values, Arc more or less does what it says. High values of Arc causes the Hoop to become more circular. Low values of Arc chops down the Hoop to just a section.
At high Apogee values, Arc sort of squishes the arc inwards instead of truncating it, especially when Arc is set to a low value.
Used by: Chroma Hoop
Applies a blur to the Sprite. Set to 0 by default, which means no blur is applied. The value determines how much of that blur is applied, measured in percentage. The higher the value, the more heavily the blur will be applied.
Used by: Image Sprite
Sets the brightness of the element. High values make the element brighter. Low values make the element less bright and more transparent.
Scale and Brightness combine to set the overall strength of the effect. Lower settings will have the effect fade off quickly. Higher settings will add sharp white streaks of light.
Used by: Spike Ball, Star Filter, Star Filter (new), Polygon Spread, Circle Spread, Elliptical Caustic, Star Caustic, Fading Ring, Element Strip, Stripe, Random Fan, Poly Spike, Aperture Reflection, Chroma Hoop, Single Poly, Disk, Ellipse, Sparkle, Chroma Fan, Tilted Ellipses, Barrel, Horizontal Spread, Rectangular Spread, Lens Texture, Vertical PolySpread
This random seed varies the look of the effect by setting a seed value for the randomness of the brightness.
Used by: Polygon Spread, Circle Spread, Photon Spike, Vertical PolySpread
Sets the color of the center Stripe line, which is visible if Render Center Line is turned on.
Used by: Stripe
Center Fade checkbox, Center Fade Rate
This checkbox and slider control how the Element will behave as it reaches the center or edges of a comp. The Center Fade checkbox activates Center Fade Rate.
At a value of 1, the Element will be at full opacity along the edges of your comp, but fades as it reaches the center of your comp. At a value of 50, the Element is at full opacity at all locations in your comp. At a value of 100, the Element is at full opacity at the comp center, but fades as it reaches the comp edges.
Used by: Single Poly, Image Sprite
This expands the inner circle of the element, creating a transparent hole in the center. High values make the inner circle look larger and thicker.
TIP: By adjusting Center Offset of a disk instead of Inside Ramp, you can create a hard edged inner circle. If you use Inside Ramp to create the transparent center, you will always have a soft edge.
Used by: Disk, Ellipse
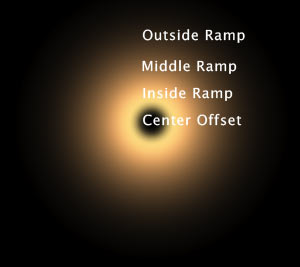
Diagram of the center offset of a Disc.
Defines how the color spectrum is applied to the Hoop shape. Lower values desaturate the color. Higher values apply color intensity.
Used by: Chroma Hoop
Different seed values produce slightly different variations of clipping patterns on the ellipses created by the Number of Ellipses control.
Used by: Tilted Ellipses
Determines how many bands the fan breaks down into. Lower values form the appearance of a smooth band. Higher values create the appearance of separate band.
Used by: Chroma Fan
Sets the color of the element. The default varies with the element effect.
Used by: Spike Ball, Star Filter, Polygon Spread, Circle Spread, Elliptical Caustic, Star Caustic, Random Fan, Poly Spike, Photon Spike, Chroma Hoop, Single Poly, Disk, Ellipse, Sparkle, Chroma Fan, Tilted Ellipses, Barrel, Horizontal Spread, Rectangular Spread, Lens Texture, Vertical PolySpread
This random seed varies the look of the effect. It sets a seed value for the randomness of the color. Different seed values produce slightly different variations.
Used by: Polygon Spread, Circle Spread, Vertical PolySpread
The fan in a Chroma Hoop is made up of many rays of color. Density sets how many rays are there and therefore how solid the Fan appears. At low values, the Fan will appear to be more faded and transparent because there are fewer rays creating it. High values create more rays and a more solid looking fan.
Used by: Chroma Hoop, Chroma Fan
Turned on by default. Makes the Inner Color active, which produces a multi-colored effect.
Used by: Aperture Reflection
Sets the circular shape of the ellipse. A value of 0 forms a full circle. Higher values narrow the shape into a 'flatter' ellipse.
Used by: Tilted Ellipses
Element Count, Number of Elements
Sets the number of individual objects that form the whole element. For Rectangular Spread, this is the number of rectilinear lines that appear together. For Star Filter, this is the number of blades that form the star.
Used by: Star Filter, Star Filter (new), Polygon Spread, Circle Spread, Random Fan, Poly Spike, Photon Spike, Barrel, Vertical PolySpread, Horizontal Spread, Rectangular Spread, Sparkle
Sets how much of the Star bands are made opaque by the gradient tint./p>
Used by: Star Filter (new)
Sets the color of grid lines in the preview window. The default is light blue.
Used by: Guides
Set the number of quadrants the grid is divided into. The range is 1 - 100. The default is 20.
Used by: Guides
Moves the Spread elements along the X plane.
Used by: Polygon Spread, Circle Spread, Horizontal Spread, Rectangular Spread
For Horizontal Spread and Rectangular Spread, this control lengthens or shortens the lines. For Vertical PolySpread, this control increases or decreases the thickness of its lines.
Used by: Horizontal Spread, Rectangular Spread, Vertical PolySpread
Moves the Barrel elements along the X plane.
Used by: Barrel
Changes the color tint of the Spread lines by moving through the RGB color spectrum.
Used by: Horizontal Spread, Rectangular Spread
Sets a tint to the inner color of the glow.
Used by: Glow Ball, Aperture Reflection, Stripe
Sets a tint to the inner color of the glow.
Used by: Star Filter (new)
A 'ramp' means going from transparent and ‘ramping up’ to fully opaque. You will see a smooth gradient of color going from barely visible to a solid color. The Inside Ramp defines how big this ramp is coming out from the center of the disc. The larger the value, the larger the soft area going up from center to the mid-point of the ring.
TIP: If Inside Ramp is set to 0 and Center Offset is larger than 1, there will always be a solid center or a hard edge on the inside of your ring.
Used by: Disk, Ellipse
Increases or decreases the length of the Stripe element.
Used by: Stripe
Maintain Aspect Ratio checkbox
Locks the Scale X and Scale Y controls together so their aspect ratio is preserved as you change the size of your Image Sprite. If you'd like to stretch out the Sprite, uncheck this box.
Used by: Image Sprite
Sets the color of the position and orientation marker on the preview window.
Used by: Guides
This option is not really a transparency-to-opacity ramp. It sets the width of the band between the Inside Ramp and Outside Ramp. If Middle Ramp is set to 0, then you will see a thin, bright band of color defining the transition of Inside to Outside. Otherwise, you’ll see a band of solid color. The larger the value of Middle Ramp, the thicker that band of solid color will be.
TIP: Usually the Disc looks like a shaded sphere, with soft edges everywhere. By setting Center Offset to 1 and Inside Ramp to 0, setting Middle Ramp to any value larger than 0 will result in a thick, solid color disc.
Used by: Disk, Ellipse
Determines how ‘noisy’ the effect is. Do you have a soft glow or sharp streaks? Low values add a soft blend to the effect. Higher values create more visually noticeable noise.
Used by: Aperture Reflection, Chroma Hoop, Chroma Fan
Adds more or less noise pattern to the element.
Used by: Glow Ball, Circle Spread, Single Poly, Disk, Ellipse, Vertical PolySpread
Shifts the underlying fractal noise pattern, which affects the grain texture of the element. This is more noticeable if Noise Scale is set high, and depending upon which Noise Type is chosen.
Used by: Glow Ball, Polygon Spread, Circle Spread, Single Poly, Disk, Ellipse, Vertical PolySpread
Increases or decreases the grain of the noise pattern.
Used by: Glow Ball, Polygon Spread, Circle Spread, Single Poly, Disk, Ellipse, Vertical PolySpread
Applies one of three fractal noise patterns to the element. The None option turns off the pattern.
Used by: Glow Ball, Polygon Spread, Circle Spread, Single Poly, Disk, Ellipse, Lens Grime, Vertical PolySpread

Sets how many objects the Tilted Ellipse is split into. A value of 1 creates a whole ellipse shape. A value of 3 creates an ellipse that is sliced into three objects.
Used by: Tilted Ellipses
Offsets the position of the Element on the X and Y axes.
Used by: Image Sprite, Stripe, Disc, Horizontal Spread, Ellipse
Toggles how the Sparkles move out from the center. When the checkbox is active, the Sparkles move uniformly from the center. When it's inactive, they move randomly from the center with slight variances in angle.
Used by: Sparkle
Sets the color of the outer area of the glow. This is the dominant color.
Used by: Glow Ball, Element Strip, Aperture Reflection
At its default settings, this option sets the radius of the Disc or Ellipse. As soon as you have anything in the center, Outside simply determines how far beyond the Middle Ramp area it takes to fade back to complete transparency. High values make the outer edge of the sphere larger and more feathered.
Outside Ramp is the inverse of the Inside Ramp, as Outside goes from a solid color and ramping down to transparency. This creates a halo around the element.
Used by: Disk, Ellipse
Most of the elements have a Position control. This position is always along a line that passes through both the center of the image and the light source.
A value of 1 places an element at the light source. A value of 0 places an element in the center of frame. A value of -1 places an element on the opposite side of the frame from the light source.
Used by: Glow Ball, Spike Ball, Star Filter, Star Filter (new), Polygon Spread, Circle Spread, Elliptical Caustic, Star Caustic, Fading Ring, Element Strip, Random Fan, Poly Spike, Photon Spike, Chroma Hoop, Single Poly, Disk, Ellipse, Sparkle, Chroma Fan, Tilted Ellipses, Barrel, Horizontal Spread, Rectangular Spread, Vertical PolySpread, Image Sprite, Stripe
Sets how the Element moves along the X and Y axis when the Position control is adjusted.
Used by: Ellipse, Sprite Image, Stripe, Disc, Horizontal Spread, Ellipse
![]()
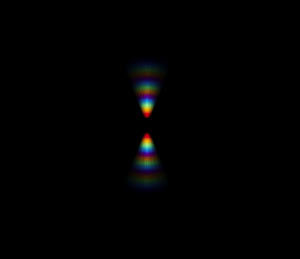
Radial Offset acts as fine tuning for the pattern scale, making it easy to get the precise size you are looking for. High values makes the two halves of the rainbow pattern larger while also moving them further apart. Low values make the rainbow pattern halves smaller and closer together.
Used by: Sparkle, Chroma Fan
![]()
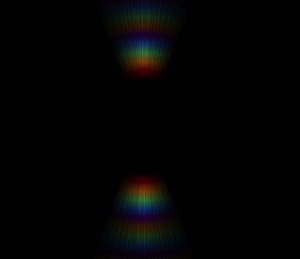
At left, Scale and Radial Offset set low. At left, Scale and Radial Offset set high.
Adjusts the black point of the Glow Ball. As Ramp Gamma is increased, the edge of the sphere is darkened and pulled inwards, making the entire Glow Ball appear smaller.
Used by: Glow Ball
Increases or decreases the size of the Glow Ball sphere.
Used by: Glow Ball
The Random Seed varies the look of the element. It sets a seed value for the randomness of the attributes. When there are two Random Seeds, Random Seed 1 will alter the look of the Element's size and position and Random Seed 2 will alter the angle of those elements.
Seed 1: Poly Spike, Horizontal Spread, Rectangular Spread, Sparkle, Spike Ball, Random Fan, Photon Spike, Barrel
Seed 2: Poly Spike, Horizontal Spread, Rectangular Spread, Sparkle
Turns on/off the characteristic bright blue line at the center of the stripe.
Used by: Stripe
Increases or decreases the brightness of the Glow Ball inner ring.
Used by: Glow Ball
Increases or decreases the width of the Glow Ball inner ring.
Used by: Glow Ball
Adds a feathered appearance to the Glow Ball inner ring, which affects the spread and thickness of the ring.
Used by: Glow Ball
Rotates the imported bitmap.
Used by: Image Sprite
Sets the size of the element. High values make the element larger.
If an element has both Scale and Brightness, these controls can be combined to set the overall strength of the effect. Low settings will make the effect fade off quickly. High settings will add sharp white streaks of light.
Used by: Spike Ball, Star Filter, Star Filter (new), Polygon Spread, Circle Spread, Elliptical Caustic, Star Caustic, Fading Ring, Random Fan, Poly Spike, Photon Spike, Aperture Reflection, Single Poly, Disk, Ellipse, Sparkle, Chroma Fan, Tilted Ellipses, Barrel, Horizontal Spread, Rectangular Spread, Vertical PolySpread
X and Y used by: Image Sprite
This checkbox toggles grid visibility in the flare preview. The default is On.
Used by: Guides
This checkbox toggles position/orientation marker visibility in the flare preview. The default is On.
Used by: Guides
This checkbox shows the area that is affected by the light effect. The default is Off. For Lens Texture, the checkbox shows you the area that is illuminated by the digital texture.
Used by: Guides, Lens Texture
Hides the characteristic red ring, which is associated with a bright light source at the center of the Glow Ball.
Used by: Glow Ball
Sets the number of element sides. The minimum is 3 sides and the maximum is 16.
Used by: Polygon Spread, Single Poly
Varies the look of the Polygon Spread by setting a seed value for the randomness of its number of sides. Different seed values produce slightly different variations.
Used by: Polygon Spread
Size sets the overall size of the effect. Low values make it narrower. High values make it thicker.
Size and Width work in conjunction to set the size of the effect.
Used by: Aperture Reflection
One of three random seeds that vary the look of the element. Sets a seed value for the randomness of the element's color. Different seed values produce slightly different variations.
Used by: Circle Spread, Vertical PolySpread
Turned off by default. When this is checkmarked, the Softness parameter is active and the Disc will take on a softer, blurred look. The amount of blurring that is applied is controlled by Softness control.
Used by: Disk, Ellipse
Adds a feathered appearance to the element, which often adds a blurring as well.
Used by: Barrel, Ellipse, Element Stripe, Stripe, Star Filter, Titled Ellipses, Vertical PolySpread, Rectangular Spread, Single Poly, Chroma Hoop, Chroma Fan
Number of random lines that emanate from the center of the Spike Ball.
Used by: Spike Ball
Sets how much the effect fans out. This is basically an angle setting. High values cause the streaks to fan out wider from a single point. You can hand-type a value that is higher than the 50 slider maximum. Low values tighten the fan. A value of 0 turns off the effect completely.
Used by: Aperture Reflection, Tilted Ellipses, Horizontal Spread, Rectangular Spread, Chroma Fan
Shifts the entire Horizontal Spread shape along the Y axis.
Used by: Horizontal Spread
Sets the spacing between circles. Low values will bunch the circles together. As you increase Spread Width, the polygons will stretch out in both directions as if they’re in 3D space. This is a critical parameter for properly setting up the look of your flare when using this element.
Used by: Polygon Spread, Circle Spread, Barrel, Vertical PolySpread
Use the Choose button to add your own image as the source. A pop-up window lets you choose any bitmap file, like JPG or PNG. You can manipulate the new image using the same parameters available for pre-built Sprites.
Used by: Image Sprite
![]()
This softens the appearance of the element. The element itself does not get softened, but the regions of color bordering it get stretched out and enlarged. High values have the effect of making the element much thicker. Low values make the element look tighter and thinner.
Used by: Star Filter, Element Strip, Chroma Hoop, Single Poly, Disk, Ellipse, Chroma Fan, Tilted Ellipses, Barrel, Horizontal Spread, Rectangular Spread, Vertical PolySpread
When turned on, this checkbox adds a soft gradation to the fan shape.
Used by: Chroma Fan
Adds a gradual transition between the inner, middle and outer ramps that make up Disc or Ellipse.
Used by: Disc, Ellipse
Sets the kind of grime texture simulation that is used by Lens Texture. Options include dirt, soap and salt particles.
Used by: Lens Texture
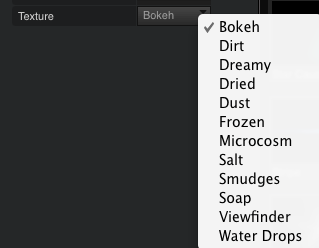
Adds more particles of texture to the Lens Texture by repeating the tile that is used. Ideal range is 1 to 5. Once the value gets higher, you will start to see the repetition and seams of the tile that is used.
Used by: Lens Texture
Turned off by default. When this is turned on, the arms of the star effect are significantly wider than the default.
Used by: Star Filter
Removes the color of the imported image. A setting of 0% keeps the full original color. A setting of 100% fully desaturates the image color.
Used by: Lens Texture, Image Sprite
Increases or decreases the size of the entire Glow Ball. All of the ramps are scaled together.
Used by: Glow Ball
Moves the Spread elements along the Y plane.
Used by: Rectangular Spread, Polygon Spread, Circle Spread, Horizontal Spread
For Horizontal Spread and Rectangular Spread, this control increases or decreases the thickness of its lines. For Vertical PolySpread, this control lengthens or shortens the lines.
Used by: Horizontal Spread, Rectangular Spread, Vertical PolySpread
Tilts the Barrel elements along the Y plane.
Used by: Barrel
Width sets the size of the central point. Low values narrow the point, with a value of 1 creating a very sharp point. High values make the point thicker.
For Star Filter, the rays will not overlap at standard Width values. However, you can manually set Width to high values by typing a value into the numeric field. This will cause the rays to overlap and create interesting looks. Also for Star Filter, if the Thick checkbox is selected, then Thickness works in conjunction with Width to set how wide the rays of light are. You also want to look at how many rays have been set with Count. The Count value will affect how wide a ray has to be to start overlapping.
Used by: Star Filter, Aperture Reflection
![]()
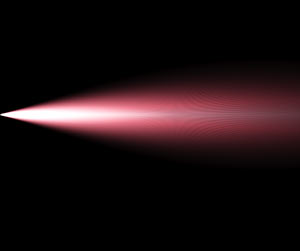
Aperture Reflection. At left, Spread set high, Noise at 3, Width at 1. At right, Spread set medium, Noise at 10, Width at 80.