Mesh Deformation Data (MDD) File Export
Starting with v1.7, Riptide Pro can now Export .mdd files. These are Mesh Deformation Data files (also known as point-cache files) originally created by the popular "Point Oven" plugin for Lightwave (and available for other 3D apps as well). Riptide Pro will animate the document and export a .mdd file for the selected mesh (any type of animation can be used - there shouldn't be any need to 'bake' animations prior to exporting).
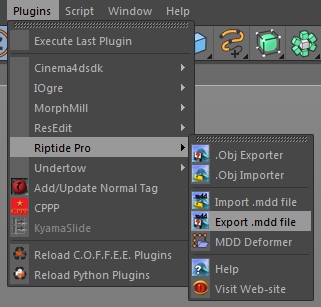
The plugin/command can be found in the Riptide Pro plugins menu...
The contents of these files are basically just sets of (new/adjusted) vertices/points for a mesh, from different frames of some animation. Because of this format, the vertex/point count in the .mdd file must match the mesh being altered. The order of those vertices must also match [Fortunately, Riptide Pro preserves the vertex-ordering when Importing/Exporting .obj files, but Cinema 4D's built-in .obj Import does not].
Note that each .mdd file is tied to one mesh - not multiple meshes in the scene - so you should select the appropriate mesh in the Cinema 4D Object Manager before activating this command (the command will be "ghosted" if no mesh object is selected).
Once activated, you will be prompted for the file to export, followed by the following Options Dialog...
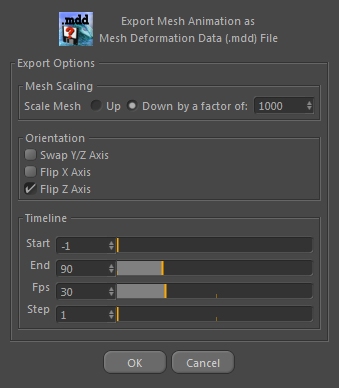
...the various options are described below in more detail.
Mesh Scaling
These controls allow you to scale the size of the mesh up or down by some multiple. For example, if the settings in the image above were used, the mesh would be scaled Down, to 1/1000th times it's original size.
Note that some software uses fractional numbers (like 2.0 and 0.5) for scaling values, but that requires that you figure out some fraction to get the mesh scaled back down correctly. With Riptide Pro, you use whole numbers and just use the same value but the opposite direction for Import/Export.
Orientation
The options in this section let you adjust the axis-orientation of the exported .mdd data. These are the same options Riptide Pro allows for .obj file Import/Export.
Timeline
The controls in this section determine which keyframes get exported (and in what order)...
Start
The First keyframe to export. Note that if the Start frame is larger (later in the timeline) than the End frame, then the animation is exported as a reverse animation. When the dialog opens, this will default to the "current" frame.
End
The Last keyframe to export. Note that if the End frame is smaller (earlier in the timeline) than the Start frame, then the animation is exported as a reverse animation. When the dialog opens, this will default to the "maximum loop" frame.
Fps
This control allows you to alter the speed of the exported animation. When the dialog opens, this will default to the current Edit Menu -> Project Settings -> Frame Rate value.
Step
This control will allow you to 'skip' frames. This value is saved between uses, so it will default to the last-used value.